Waste Walks
The waste walk approach is a core Lean tool to help identify non-value adding tasks.
Take your team on a walk through your organization to identify wastes, summarized here:
- Defects: Producing a product incorrectly, or delivering the wrong service to a customer.
- Overproduction: Making too much, be it a report or a stock of parts.
- Transport: Taking products for a walk or delivering the long way round.
- Waiting: Delays in the business caused by processes not linking together.
- Inventory: Holding inappropriate stocks of parts, materials, or people.
- Motions: Using more effort than needed to perform a task.
- Processes: Using a poor method to conduct an activity.
- Untapped Human Potential: Not encouraging and making the best use of the brains of the people who work with and for you.
All task generated will appear in the My Tasks module.
1. To create a new entry, click on the New Waste Walk button. See point 4 below.
2. You can filter and sort the existing waste walks as follows.
The Views that can filter the list are:
- My Waste Walks: This will show you the waste walks you have captured only.
- Direct Staff WWs: This filter will show your team members' waste walks.
The Search box will allow you to search for text within the Waste Walk Name, the Area or Problem fields.
The Sort field allows you to change the order of the information:
- Area: This will sort the list so that the areas are listed in alphabetical order, but with the records for the area shown as newest first.
- Date: The waste walk records will be displayed as newest first on the screen.
- Name: This will sort the list so that the walk names are listed in alphabetical order, but with the records for the area shown as newest first.
- Problem: The list will be shown so that the problems are listed in alphabetical order, again with the records for the area shown as newest first.
The filters can be reset / removed by clicking on the green reset icon, on the right hand side of the Sort field.
3. The icons on the right hand side of the waste walks list are:
- Briefcase icon: Clicking this icon will bring up the current tasks associated with the waste walk.
- Edit icon: This will allow you to edit / amend / update the waste walk. See point 4.
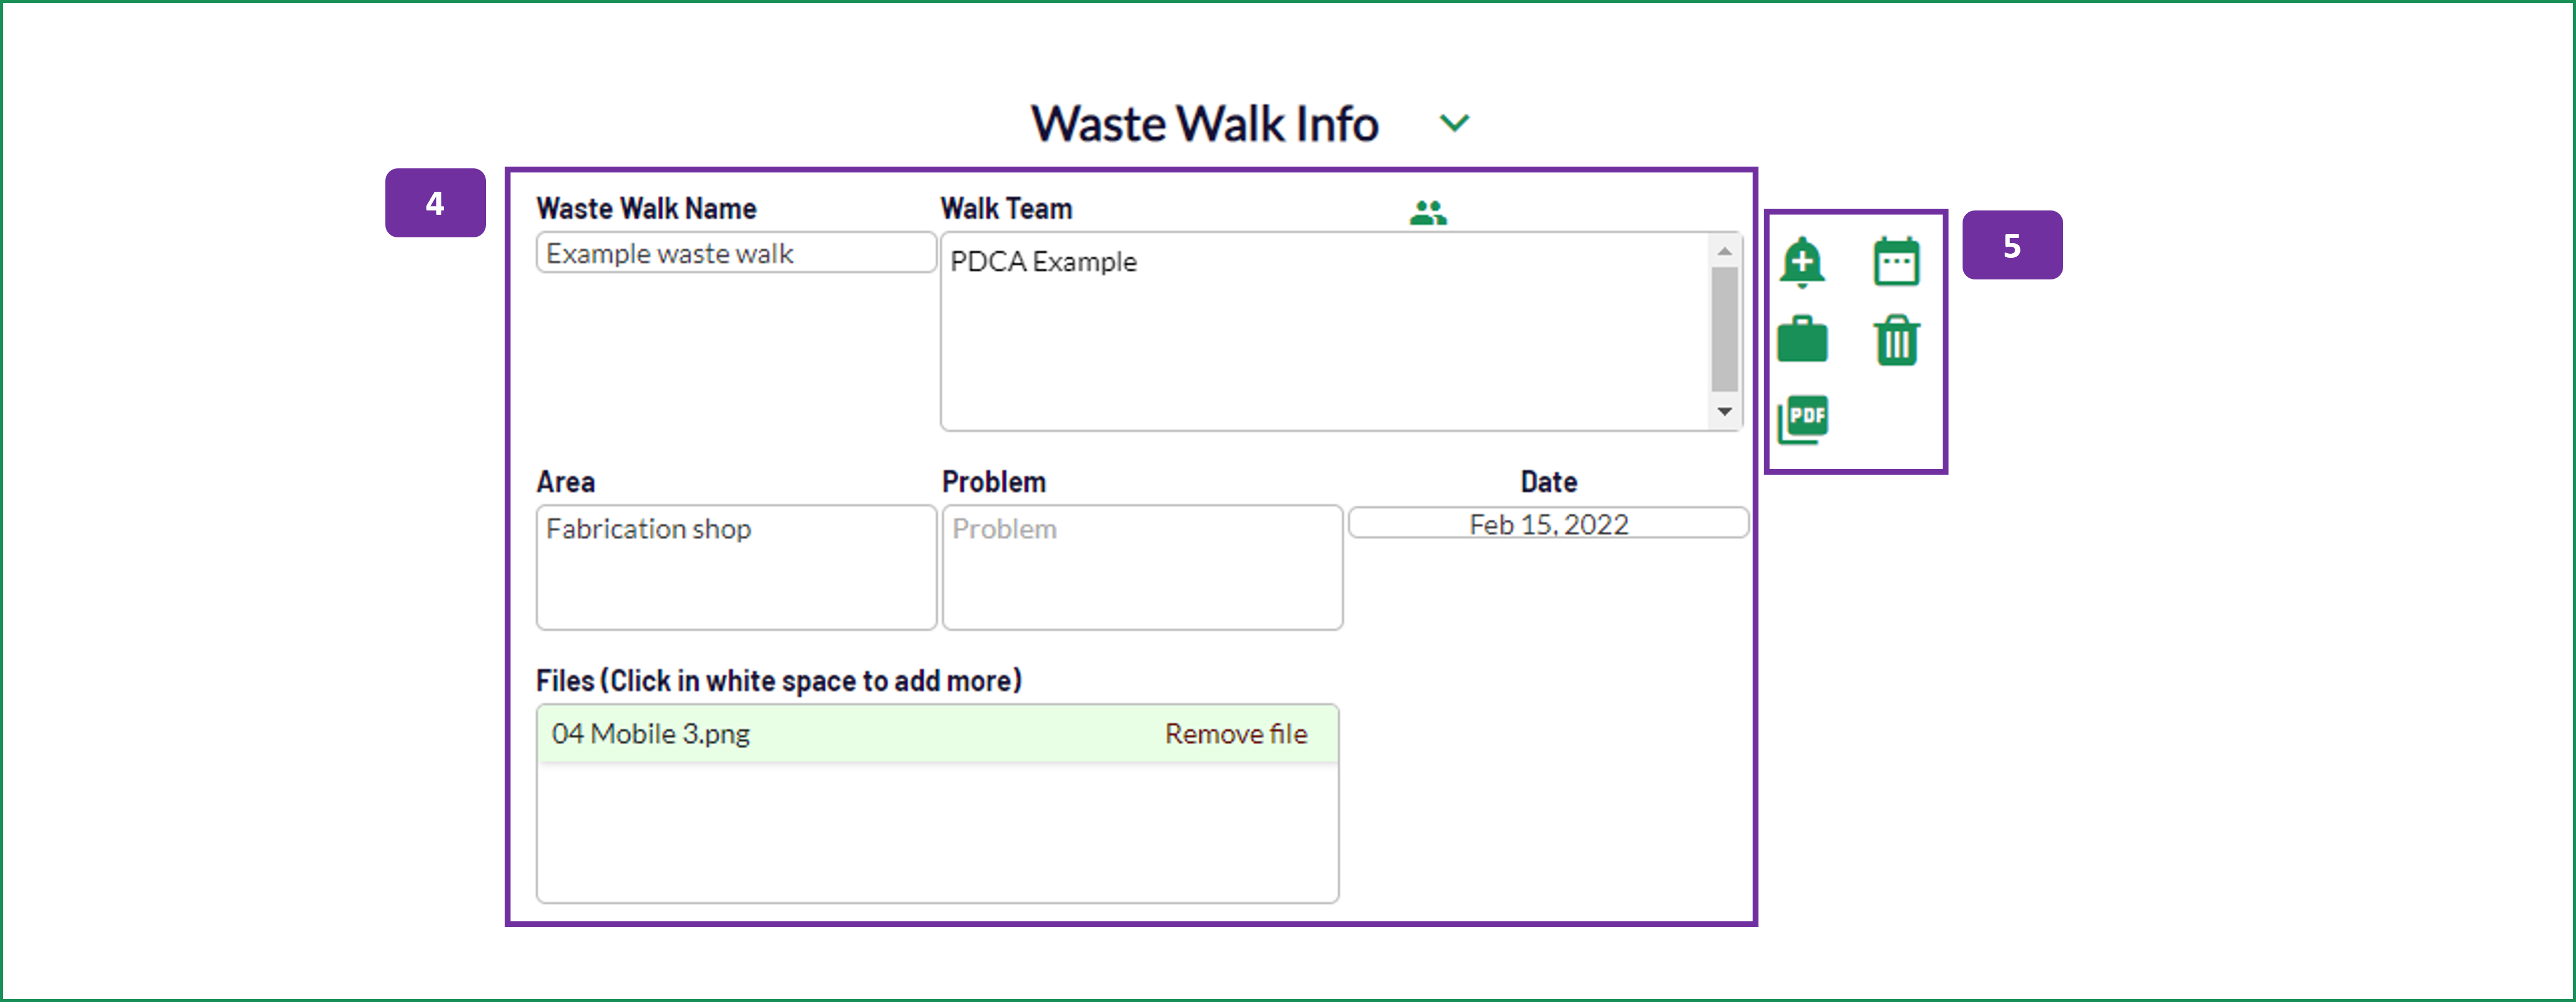
4. To add a waste walk record:
- Waste Walk Name: Provide a meaningful reference to the area of the organization that you are reviewing.
- Walk Team: To add / edit team members to this waste walk, click on the green people icon above the information box.
- Area: Define the area being examined.
- Problem: If there is a specific issue that you are investigating, record it in here for future reference.
- Date: Record the date of the waste walk. A pop up calendar will appear to allow you to select the date.
- Files:* Upload relevant documentation as required. To delete a file, click on the Remove file link. Please note that this is a paid feature and that we don't accept video files or files exceeding 5MB.
* Available to paid subscribers.
5. The icons to the right of the waste walk information are:
- Bell icon: This will add a new finding to the waste walk, see point 6.
- Briefcase icon: This will show the current tasks for this waste walk.
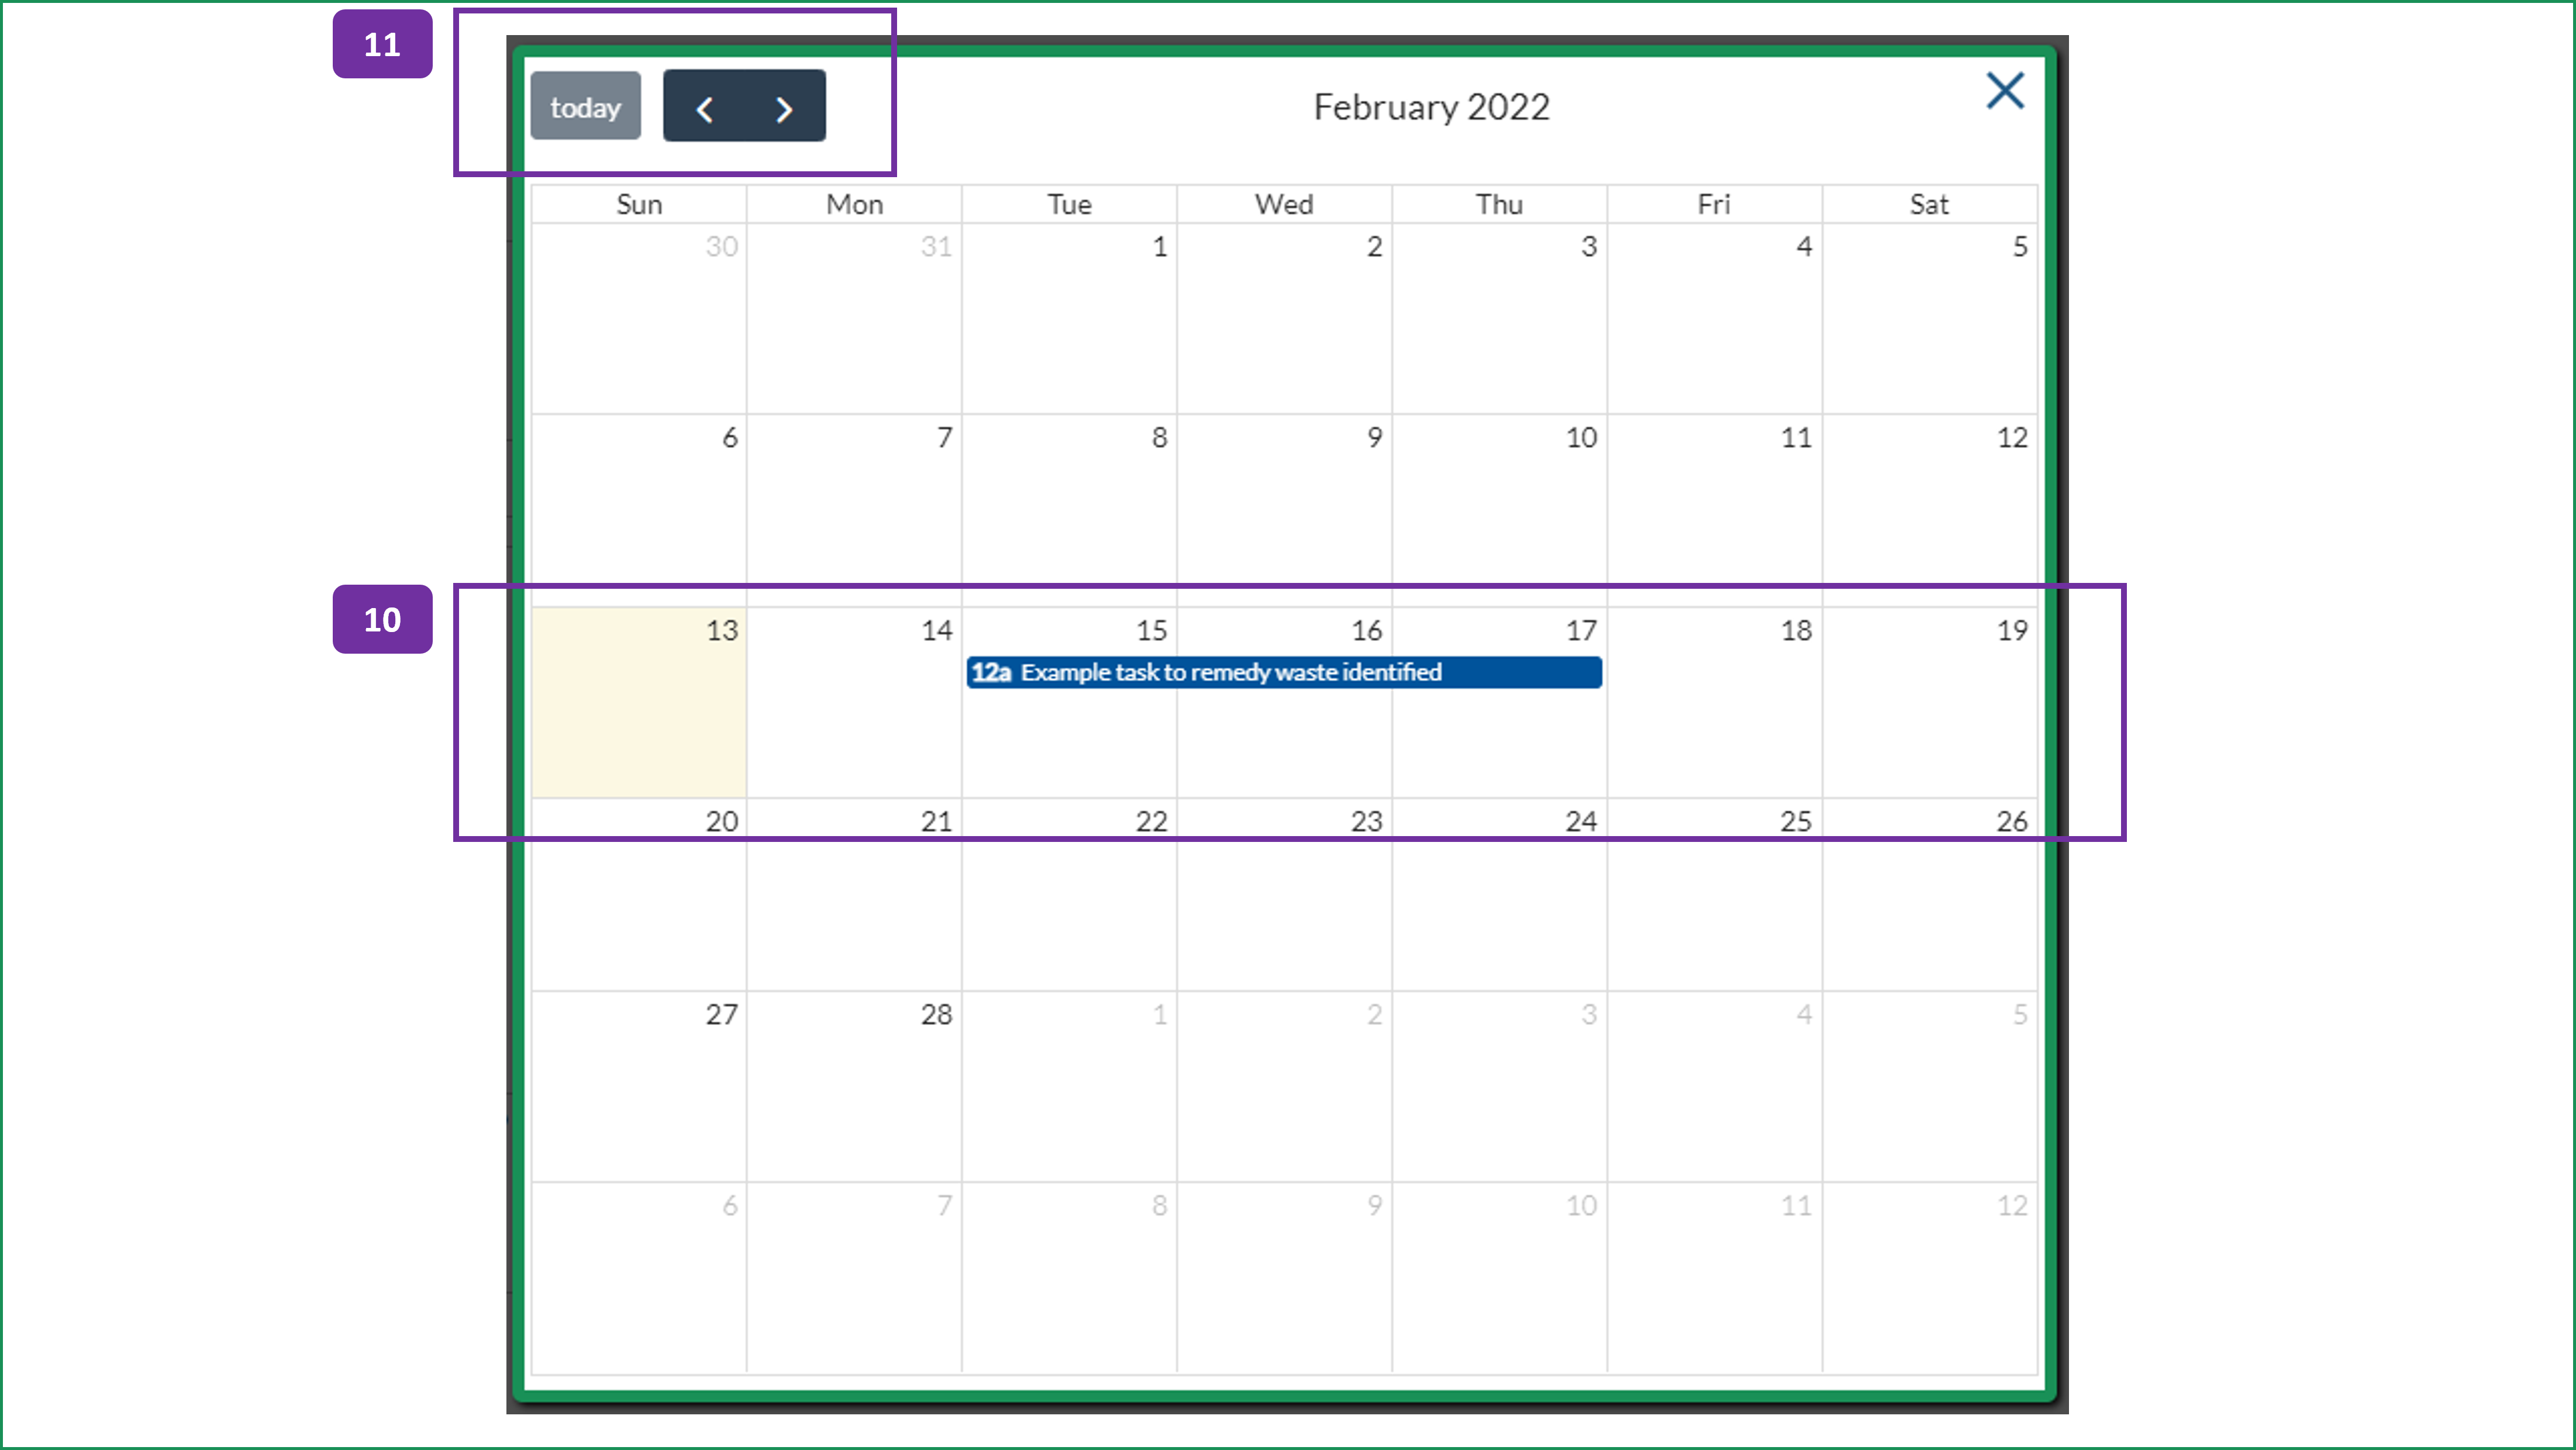
- Calendar icon: Clicking on this icon will show you the task in a calendar format, see points 10 and 11.
- Trashcan icon: To delete the waste walk, click on this icon.
- PDF icon: This will allow you to create a PDF print out of the waste walk. Please note that this is only available with a paid subscription.
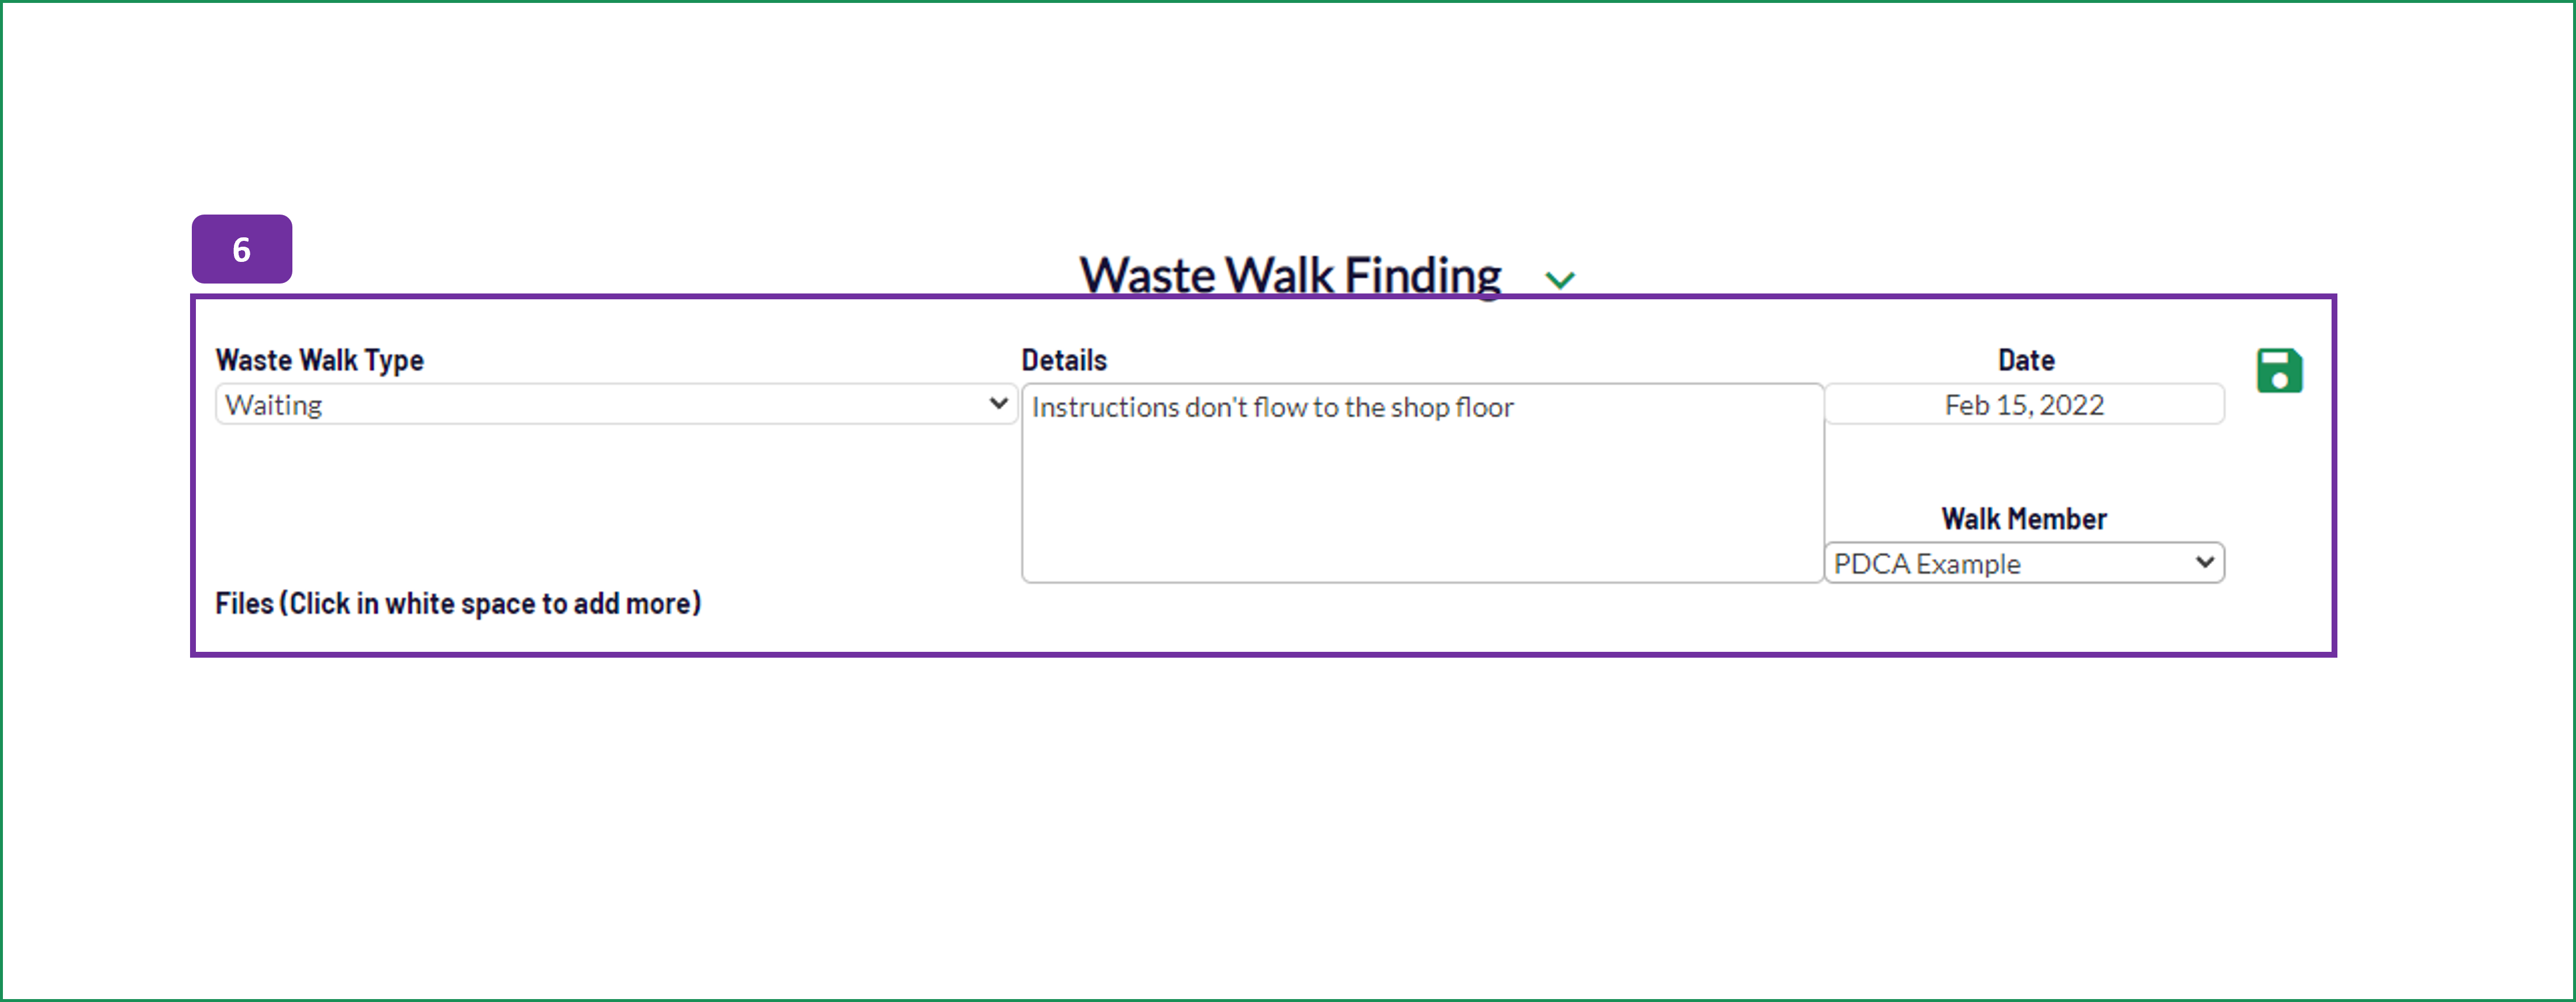
6. When adding a finding:
- Waste Walk Type: From the drop down, select the waste that has been observed (defect, overproduction, transport, waiting, inventory, motions, processes or untapped human potential - see definitions above).
- Details: Describe how the waste has been observed.
- Date: Choose the date of the finding, using the pop up calendar.
- Walk Member: Select the team member that made the observation from the drop down list.
- Disk icon: Save the finding once the information is complete.
7. Once the finding has been saved, the Files window becomes accessible. To remove a file, click on the Remove file link next to the item in question. The same limitations are in effect here (paid subscription, no videos, maximum file size 5MB).
8. The icons adjacent to the finding are now:
- Disk icon: Use this to save any changes you make to the information in the finding.
- Plus icon: Create a task, to deal with the observed waste. See point 9.
- Briefcase icon: Click on this icon to see any existing tasks linked to this finding. See point 13.
9. Add a task to the finding as follows:
- Task: Detail what needs to happen in order to remedy the waste observed. The task description will automatically capture the Waste Walk type and Details. You can edit this see item 13.
- Assigned to: Choose the team member that will be responsible for completing the task. The drop down list will be determined by the Waste Walk members.
- Approved by: If you want a second pair of eyes on the task, to confirm completion, select the team member here. The drop down list will be determined by the Waste Walk members.
- Start / Due: Select the start and end dates for the tasks using the pop up calendar for each field.
- Priority: Promote or demote the task using this field.
- Disk icon: Save the task once the above fields have been filled in.


