Projects
Creating projects is at the core of PDCA Complete. You have the option to create simple projects, or take advantage of using our Project Initiation Document (PID) approach.
Projects consist of three different statuses. A Live project means that as you create tasks, they are assign and show in My Task menu. A Queue Project lets you plan your tasks. Here you can document all of the required task but they are not live and do not show in the My Task menu. A Completed Project closes out the Project. When selected, all incomplete task will be deleted. The project members can switch the Project between any of the 3 statuses.
1. To create a new project, click on the New Project button (see step 4).
2. To view or edit a project click on the pencil icon. To delete a project, click on the trash can icon. When you delete the project it will delete all associated tasks too.
3. Similar to the My Tasks screen, there is a filtering option:
- Views: This gives you options to view projects you are associated with or your direct reports’ projects.
- Search: A search box to help you search for key terms in your projects’ names.
- Sort: You can view the list of projects by due date, project name or status.
Items View, Search and Sort work together as indicated by the arrows between the fields. For best results, complete them in order.
The green incomplete circle resets the view, search & sort parameters which lets you start your filter over.
Note: When you click onto a project, it will highlight the row in light green for ease of review.
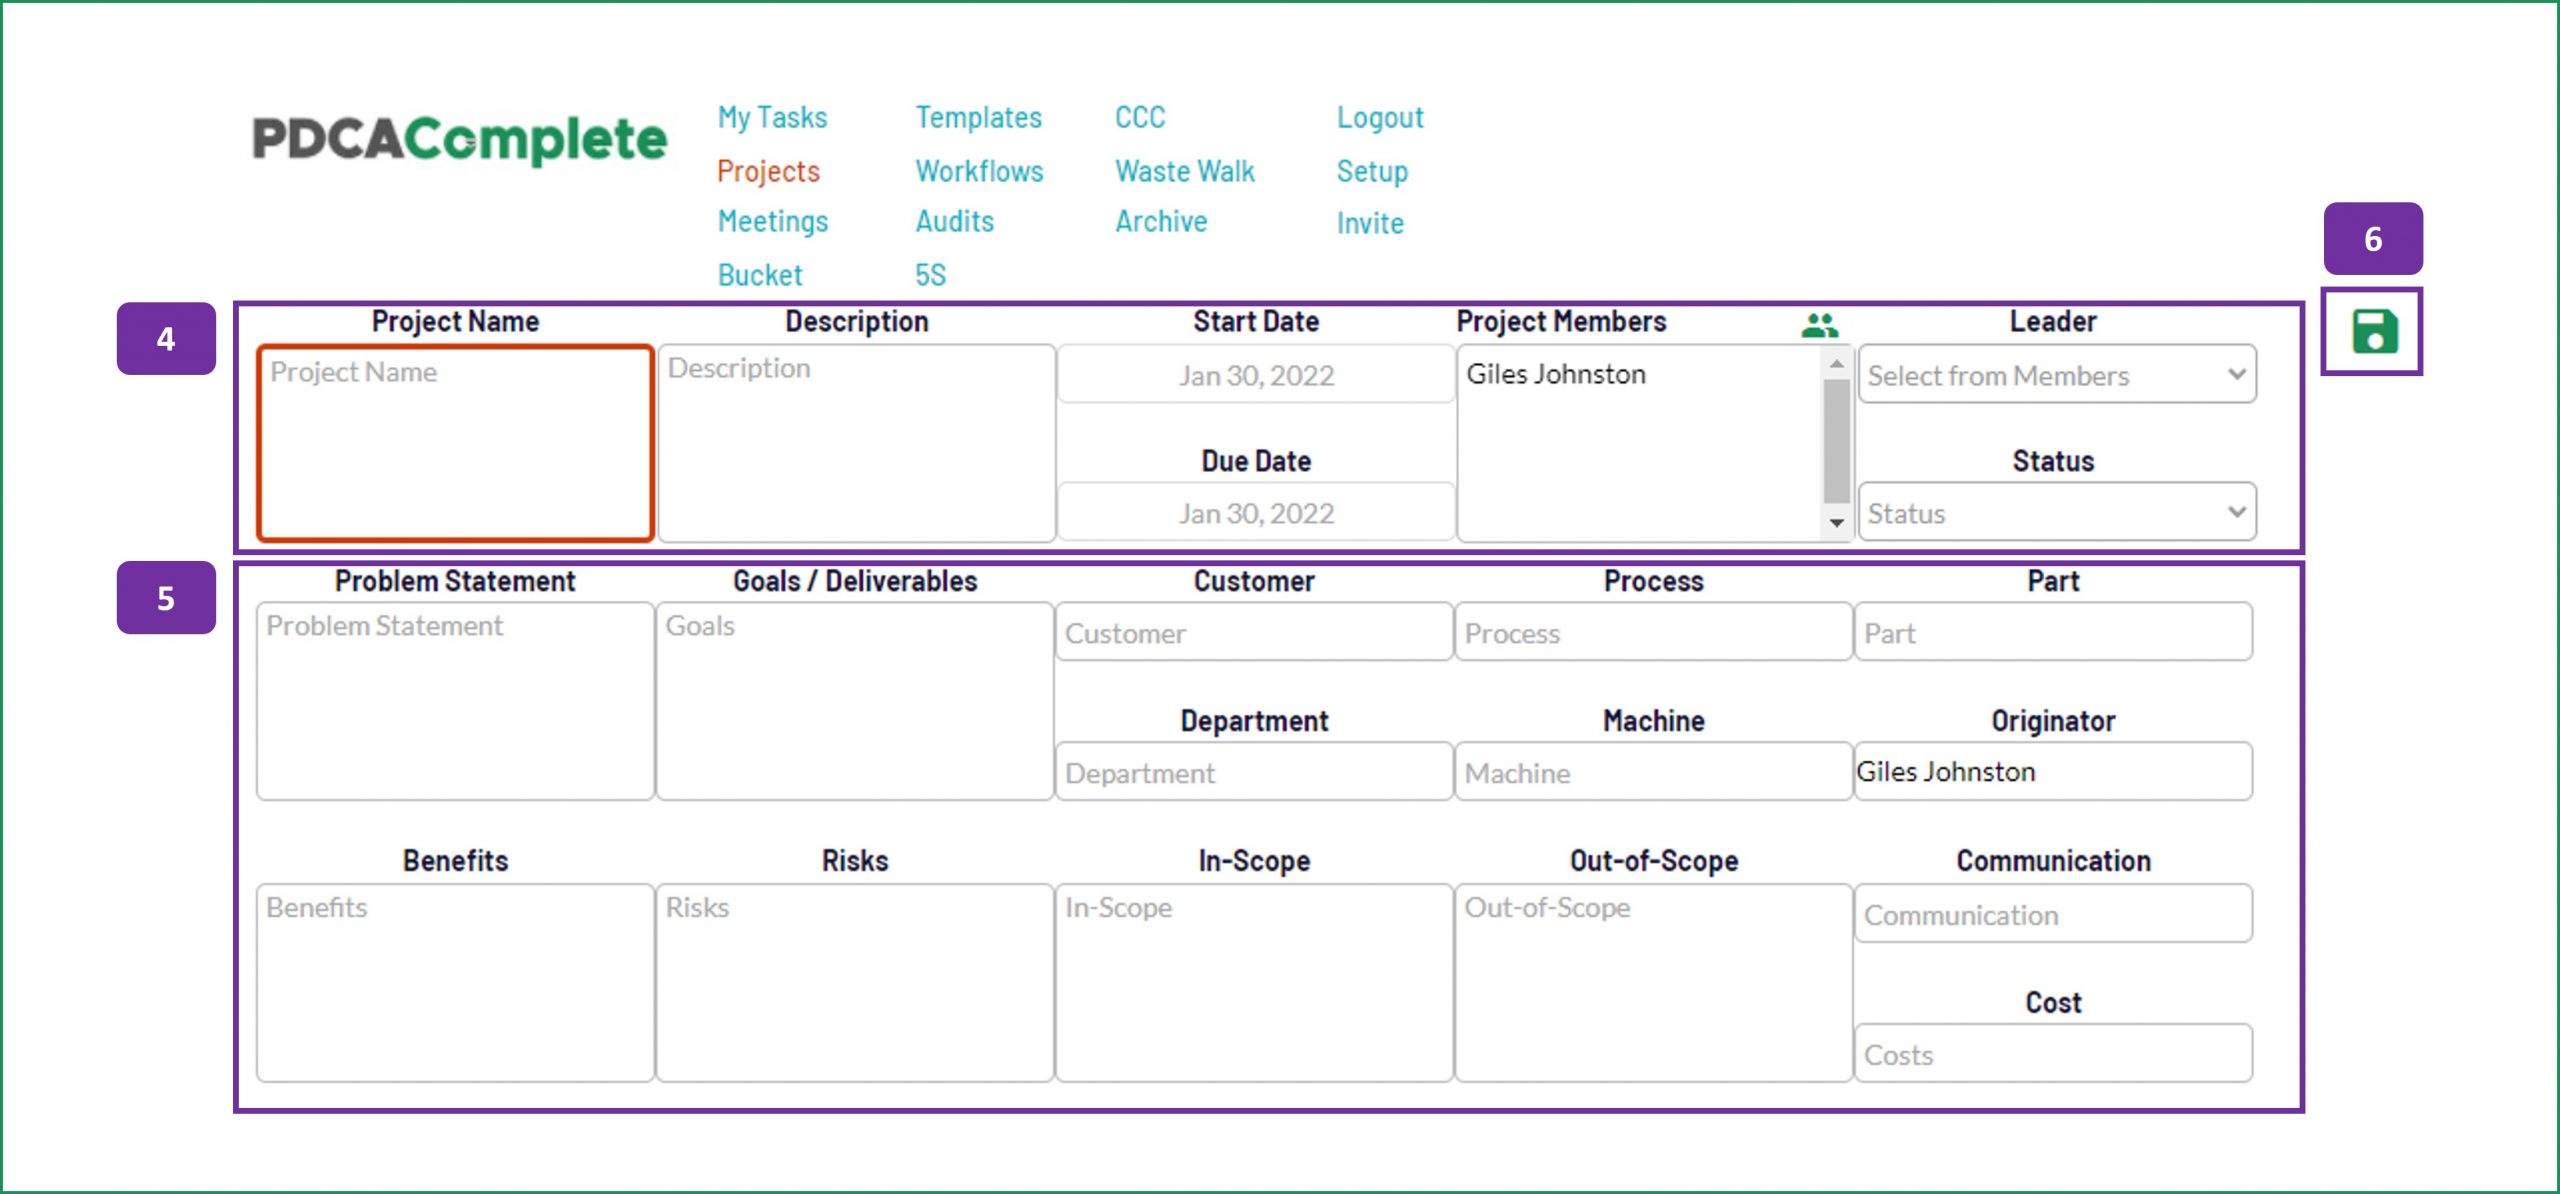
4. When creating a new project, the only mandatory field is the Project Name. The other fields are:
- Description: An outline of the project itself.
- Start Date and Due Date: Pop out calendars appear when you click on these fields, to select the appropriate dates.
- Project Members: This controls access and visibility to the project. Click on the people icon to add or remove people from the project. If the person is listed here, they will see this project in their project list.
- Leader: When you select this field you will be able to pick a team member from the list of project members.
- Status: Choose from Live, Queued and Completed. To use the project as a live document, select Live. You can create tasks against a project when it is in a Queued state, and then change the project to Live when you are ready to release the tasks into the system.
5. We have included the option to follow a PID style approach. PID stands for Project Initiation Document and is a great way to capture key project information that can help you to improve the delivery and results of a project:
- Problem Statement: Clarify what is wrong, what needs to be changed.
- Goals / Deliverables: Be clear about what you want to achieve and experience at the end of a successful project.
- Customer: Whether internal or external, who is this project for?
- Process / part / department / machine: If you are improving a specific element of your business, capture it here.
- Originator: This will default to the person that pressed ‘New Project’
- Benefits: List out the benefits, useful if you need to gain authorization before starting the project.
- Risks: If there are any risks that may derail your project, or that could jeopardize the running of your business, list them here.
- In-Scope: This is to help your team understand what is included in the project.
- Out-of-Scope: Similarly, this is to be explicit about what isn’t to be touched during the project.
- Communication: Agree how and you want this project to be communicated with the stakeholders, by recording the agreement in this field.
- Cost: If you know the cost of the project, enter it here.
Completing this part of the project form is useful if you want to propose and evaluate projects formally, or if you want to record key project information for later reference.
6. The green disk icon will appear after you have entered a name for the project, click this to save your changes to the project description etc…
7. Once you have saved the details of your project (high level, or full PID), the following icons will appear:
- Arrow icon: This takes you back to the full list of projects.
- List icon: This brings up an agenda, that you can define, for project reviews. See point 9.
- Clipboard icon: This brings up the notes function for the project. See points 10 and 11.
- Disk icon: Clicking on this icon will save any changes you make to the projects description / PID.
- Down arrow icon: Clicking on the down arrow will toggle the PID element of the project header.
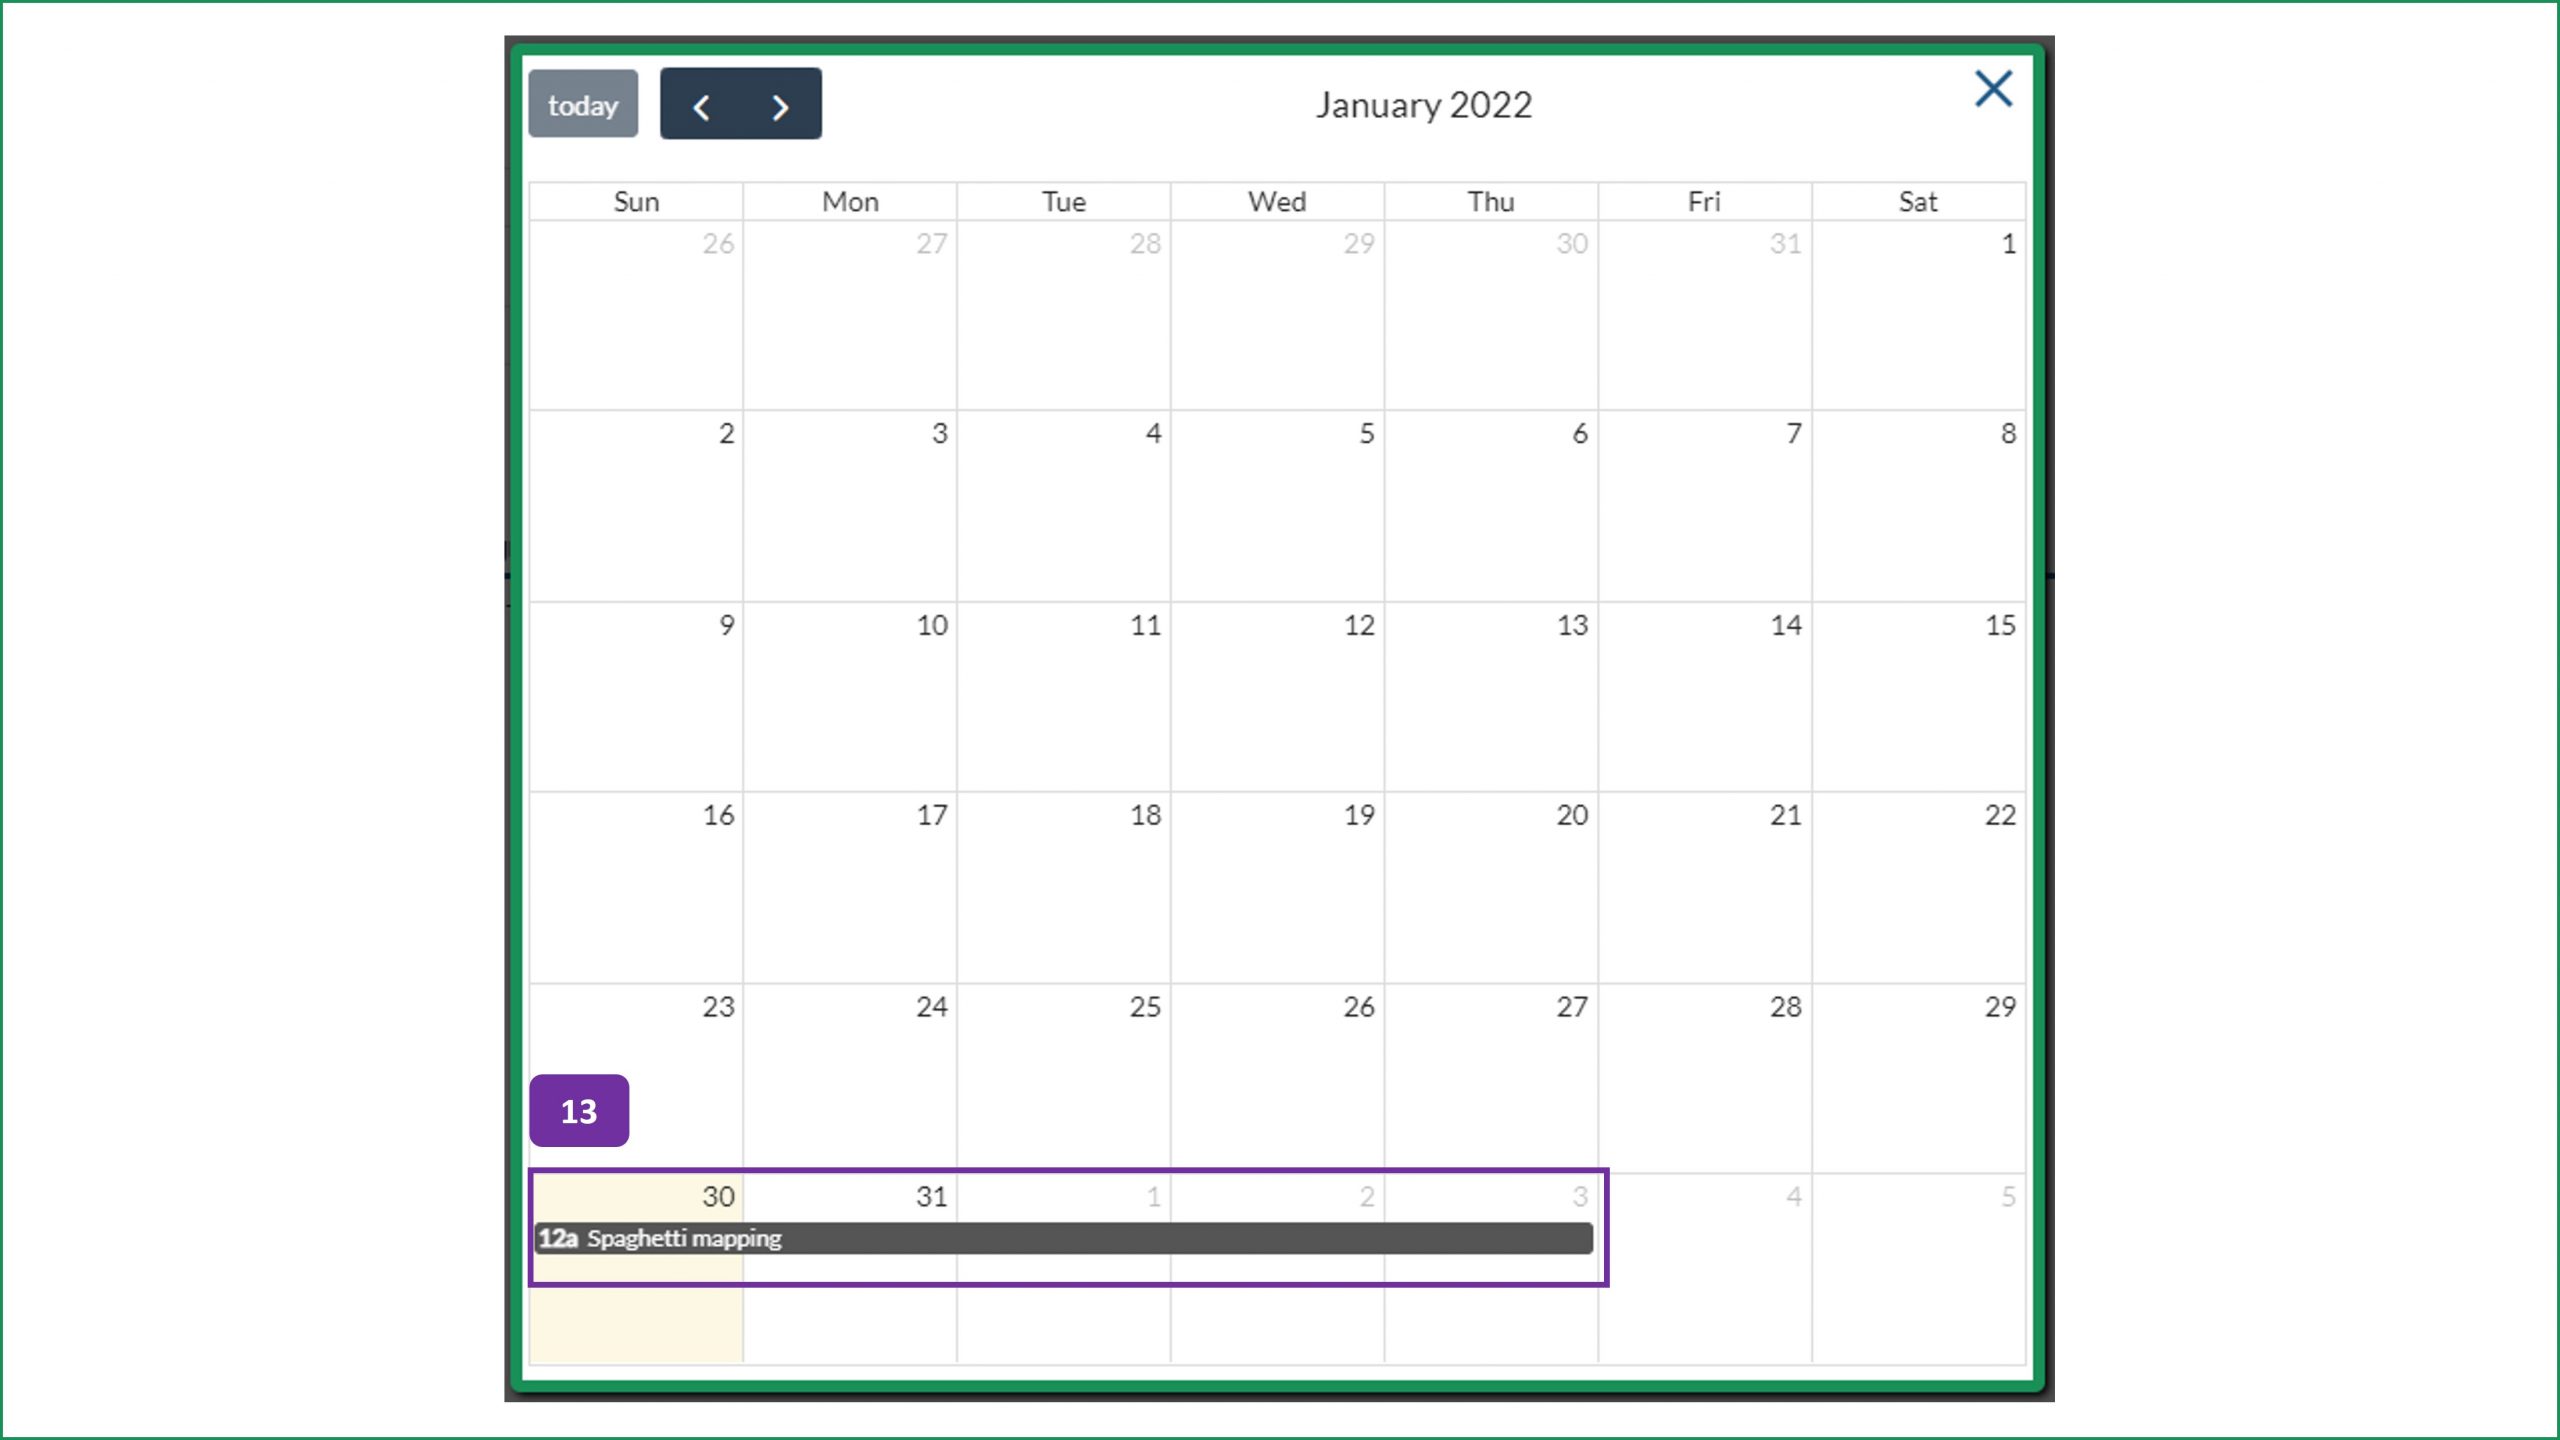
- Calendar icon: This will show you the task start and end dates for the project, in a calendar format, see point 13.
- PDF icon: This will allow you to create a PDF print out of the project. Please note that this is only available with a paid subscription.
- Project Files* will show under the PID element. Here you can attached your important files that support the project. We do not allow for videos or other large files. Please keep the file size less than 5 MB or they will be deleted. See point 14 below.
*Paid subscription only.
8. To add a new task to the project, use the New Task button. See point 12.
9. Creating a standard agenda for reviewing your projects is simple with this view:
- Click on the New Item button to add a new agenda point.
- Type in the description and then the order (sequence on the agenda) in the corresponding field.
- Click on the disk icon to save the item.
- To edit an agenda point, use the pencil icon to edit the entry.
- To adjust the sequence, change the Order value.
- When you have finished editing the agenda, use the cross icon in the top right hand corner.
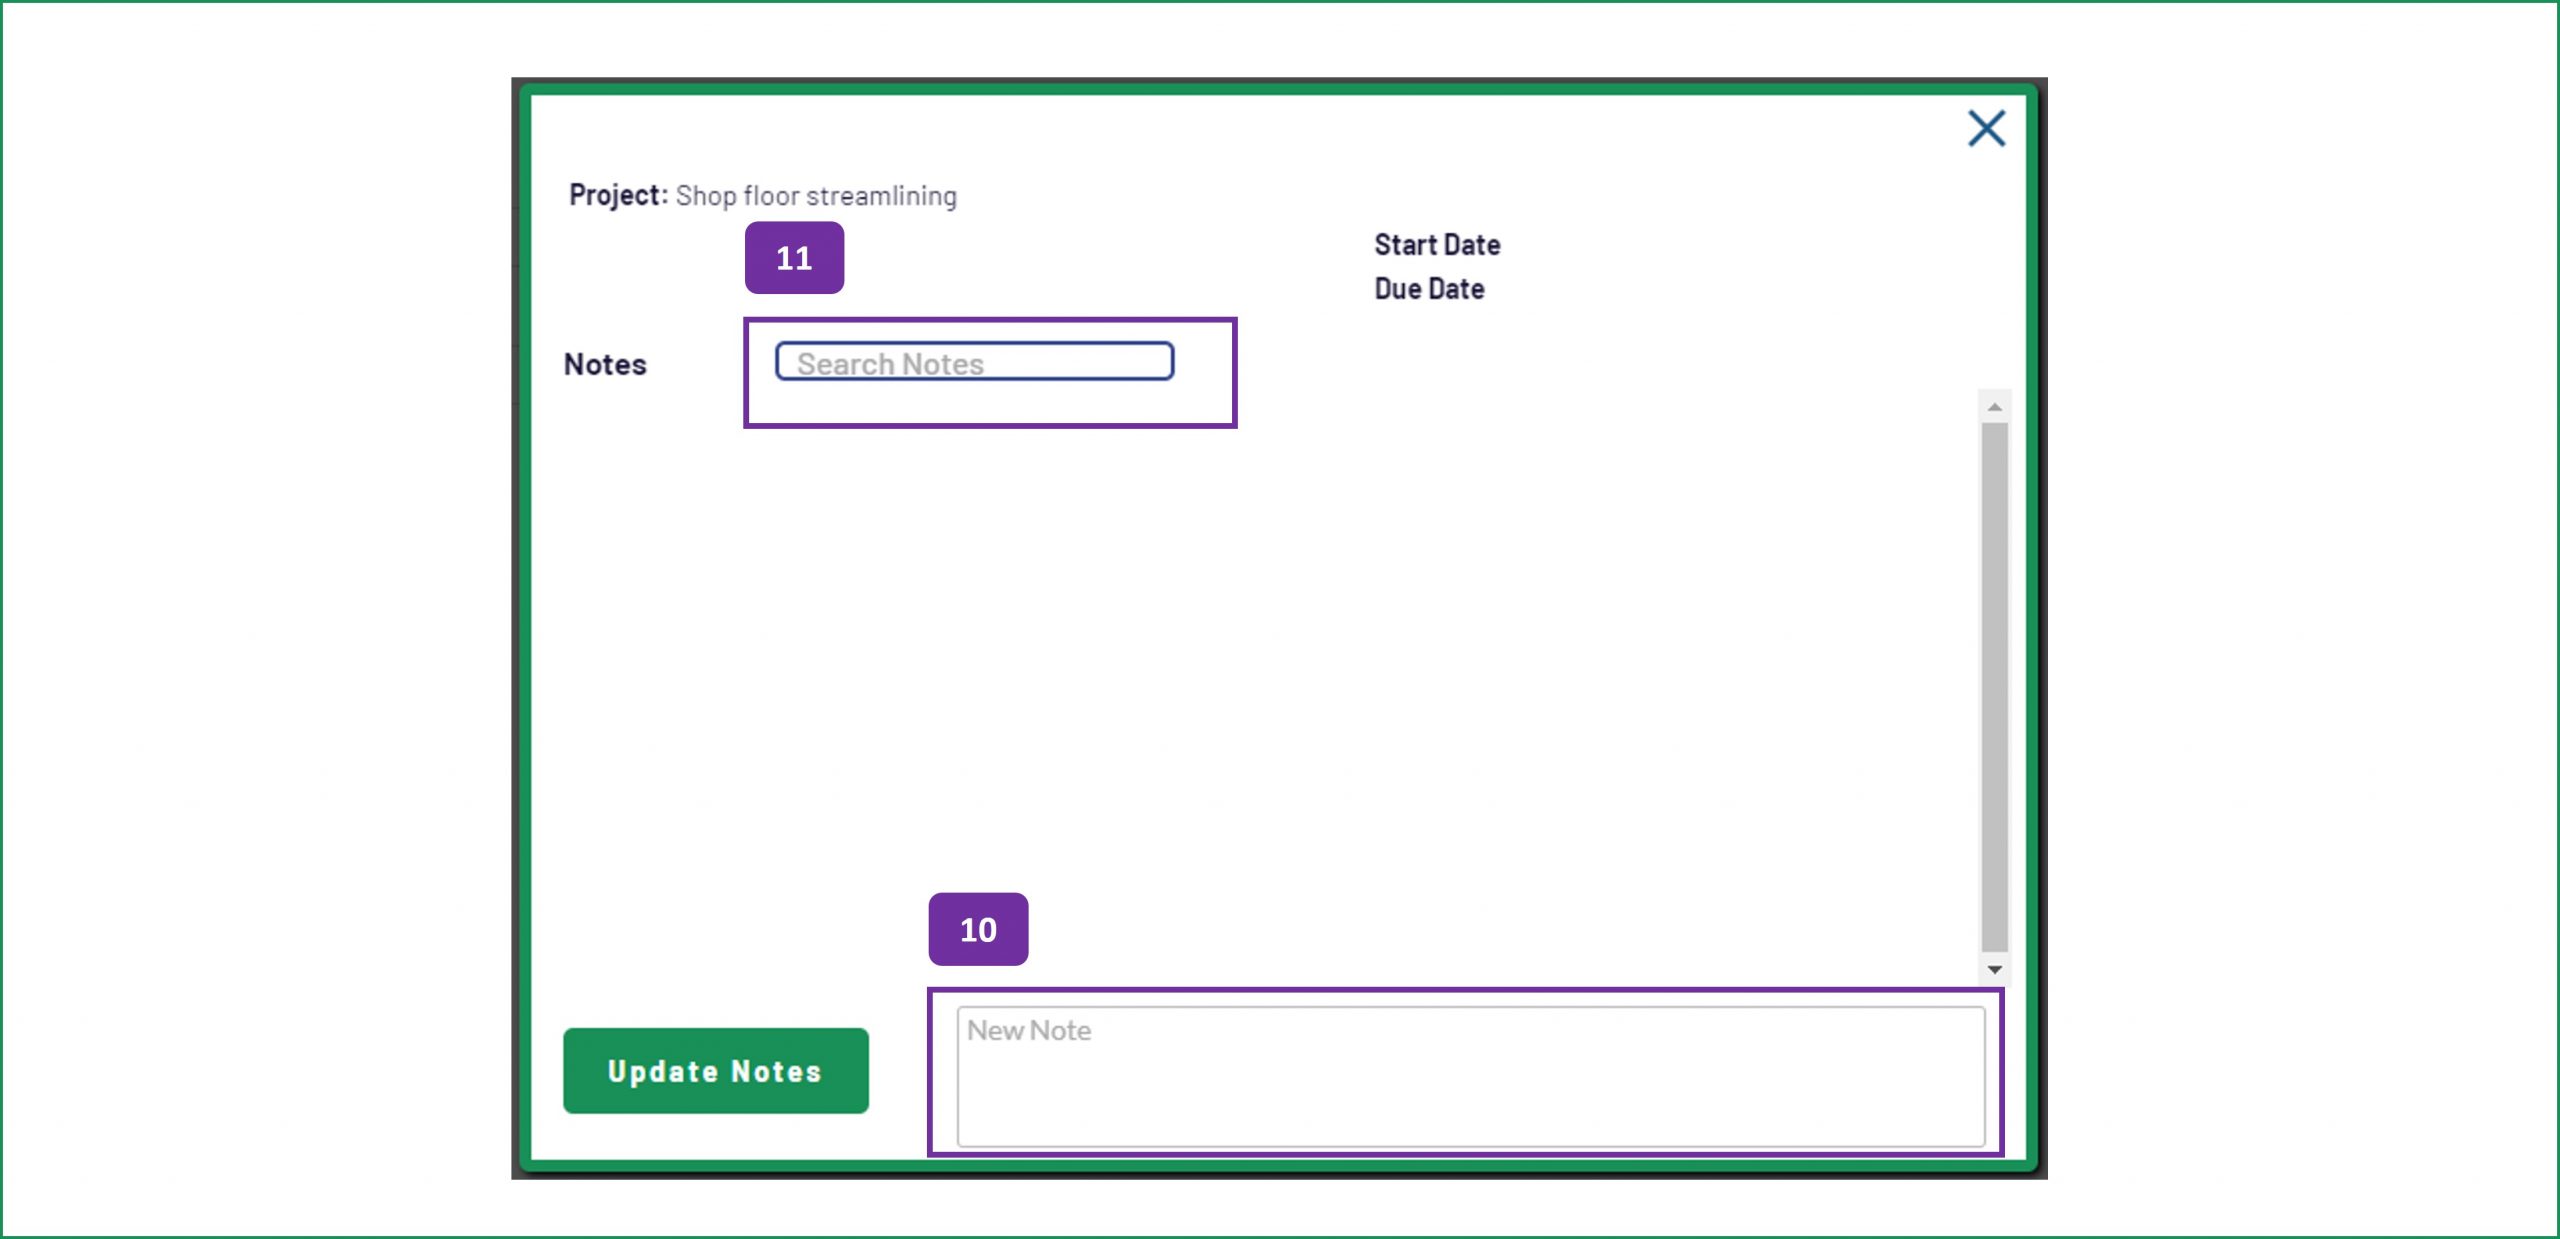
10. You can add new notes to the project by typing into the new note field and clicking on the Update Notes button. Ctrl and Enter also work.
11. If you need to search through the notes (for key phrases etc…) you can do this with the search field at the top of the notes pop up.
Note: You can close this window by clicking outside of the window, or by using the cross icon in the top right hand corner.
12. When you add a new task to the project, fill in the fields as listed
- Task: Overview of the task to be carried out.
- Description: Additional information related to the task.
- Assigned To: The team member you want to be responsible for the task. The possible team member choices depends on the Project Members. All assignees for each team member will be listed.
- Approved By: Optional approver for the task, if required. The possible team member choices depends on the Project Members. All approvers for each team member will be listed.
- Start and Due: Dates for the task. A pop up calendar will appear when you click into these fields.
- Priority: Relative priority for the tasks, can be used in the My Tasks section to sort tasks.
Mandatory fields are in red and these change depending on Project's status.
When you create the task information, a green disk icon will appear on the right hand side. Click this to save the task against the project. Further edits can make changes such as adding a file through the edit task icon.
Stakeholders are automatically created by copying the Project members. These can be edit through the edit task pop-up.
Unlike the My Task page where only the Issuer can only make changes to the tasks, here, all Project members can make changes to the listed tasks.
14. When you click on the down arrow icon (point 7), these fields are visible:
- Closed By: Choose the Team Member that has closed the project down.
- Closed Date: Click into this field to select the date the project was closed / completed.
- Project Files: Use this field to add files to the project. This is for paid subscriptions only and we do not allow videos and files greater that 5 MB.


