Meetings
Get the most from your meetings by efficiently capturing the decisions reached and actions agreed. Never let a meeting's impact slip past your team again!
1. Click on the New button to create a new meeting record. See points 4 and 5.
2. The following options are available for meetings:
- The briefcase icon: Add and edit the meeting’s records / tasks.
- The edit / pencil icon: Change the settings for the meeting, including attendees, see points 4 and 5.
- The trashcan icon: Delete the meeting.
3. The list of meetings will be shown newest first as default.
You can change this view by using the Views option:
- My Meetings: This shows you the meetings that you have been part of.
- Direct Staff Meetings: This shows you the meetings that your direct reports have been part of. The list of your direct reports is configured in the Setup screen.
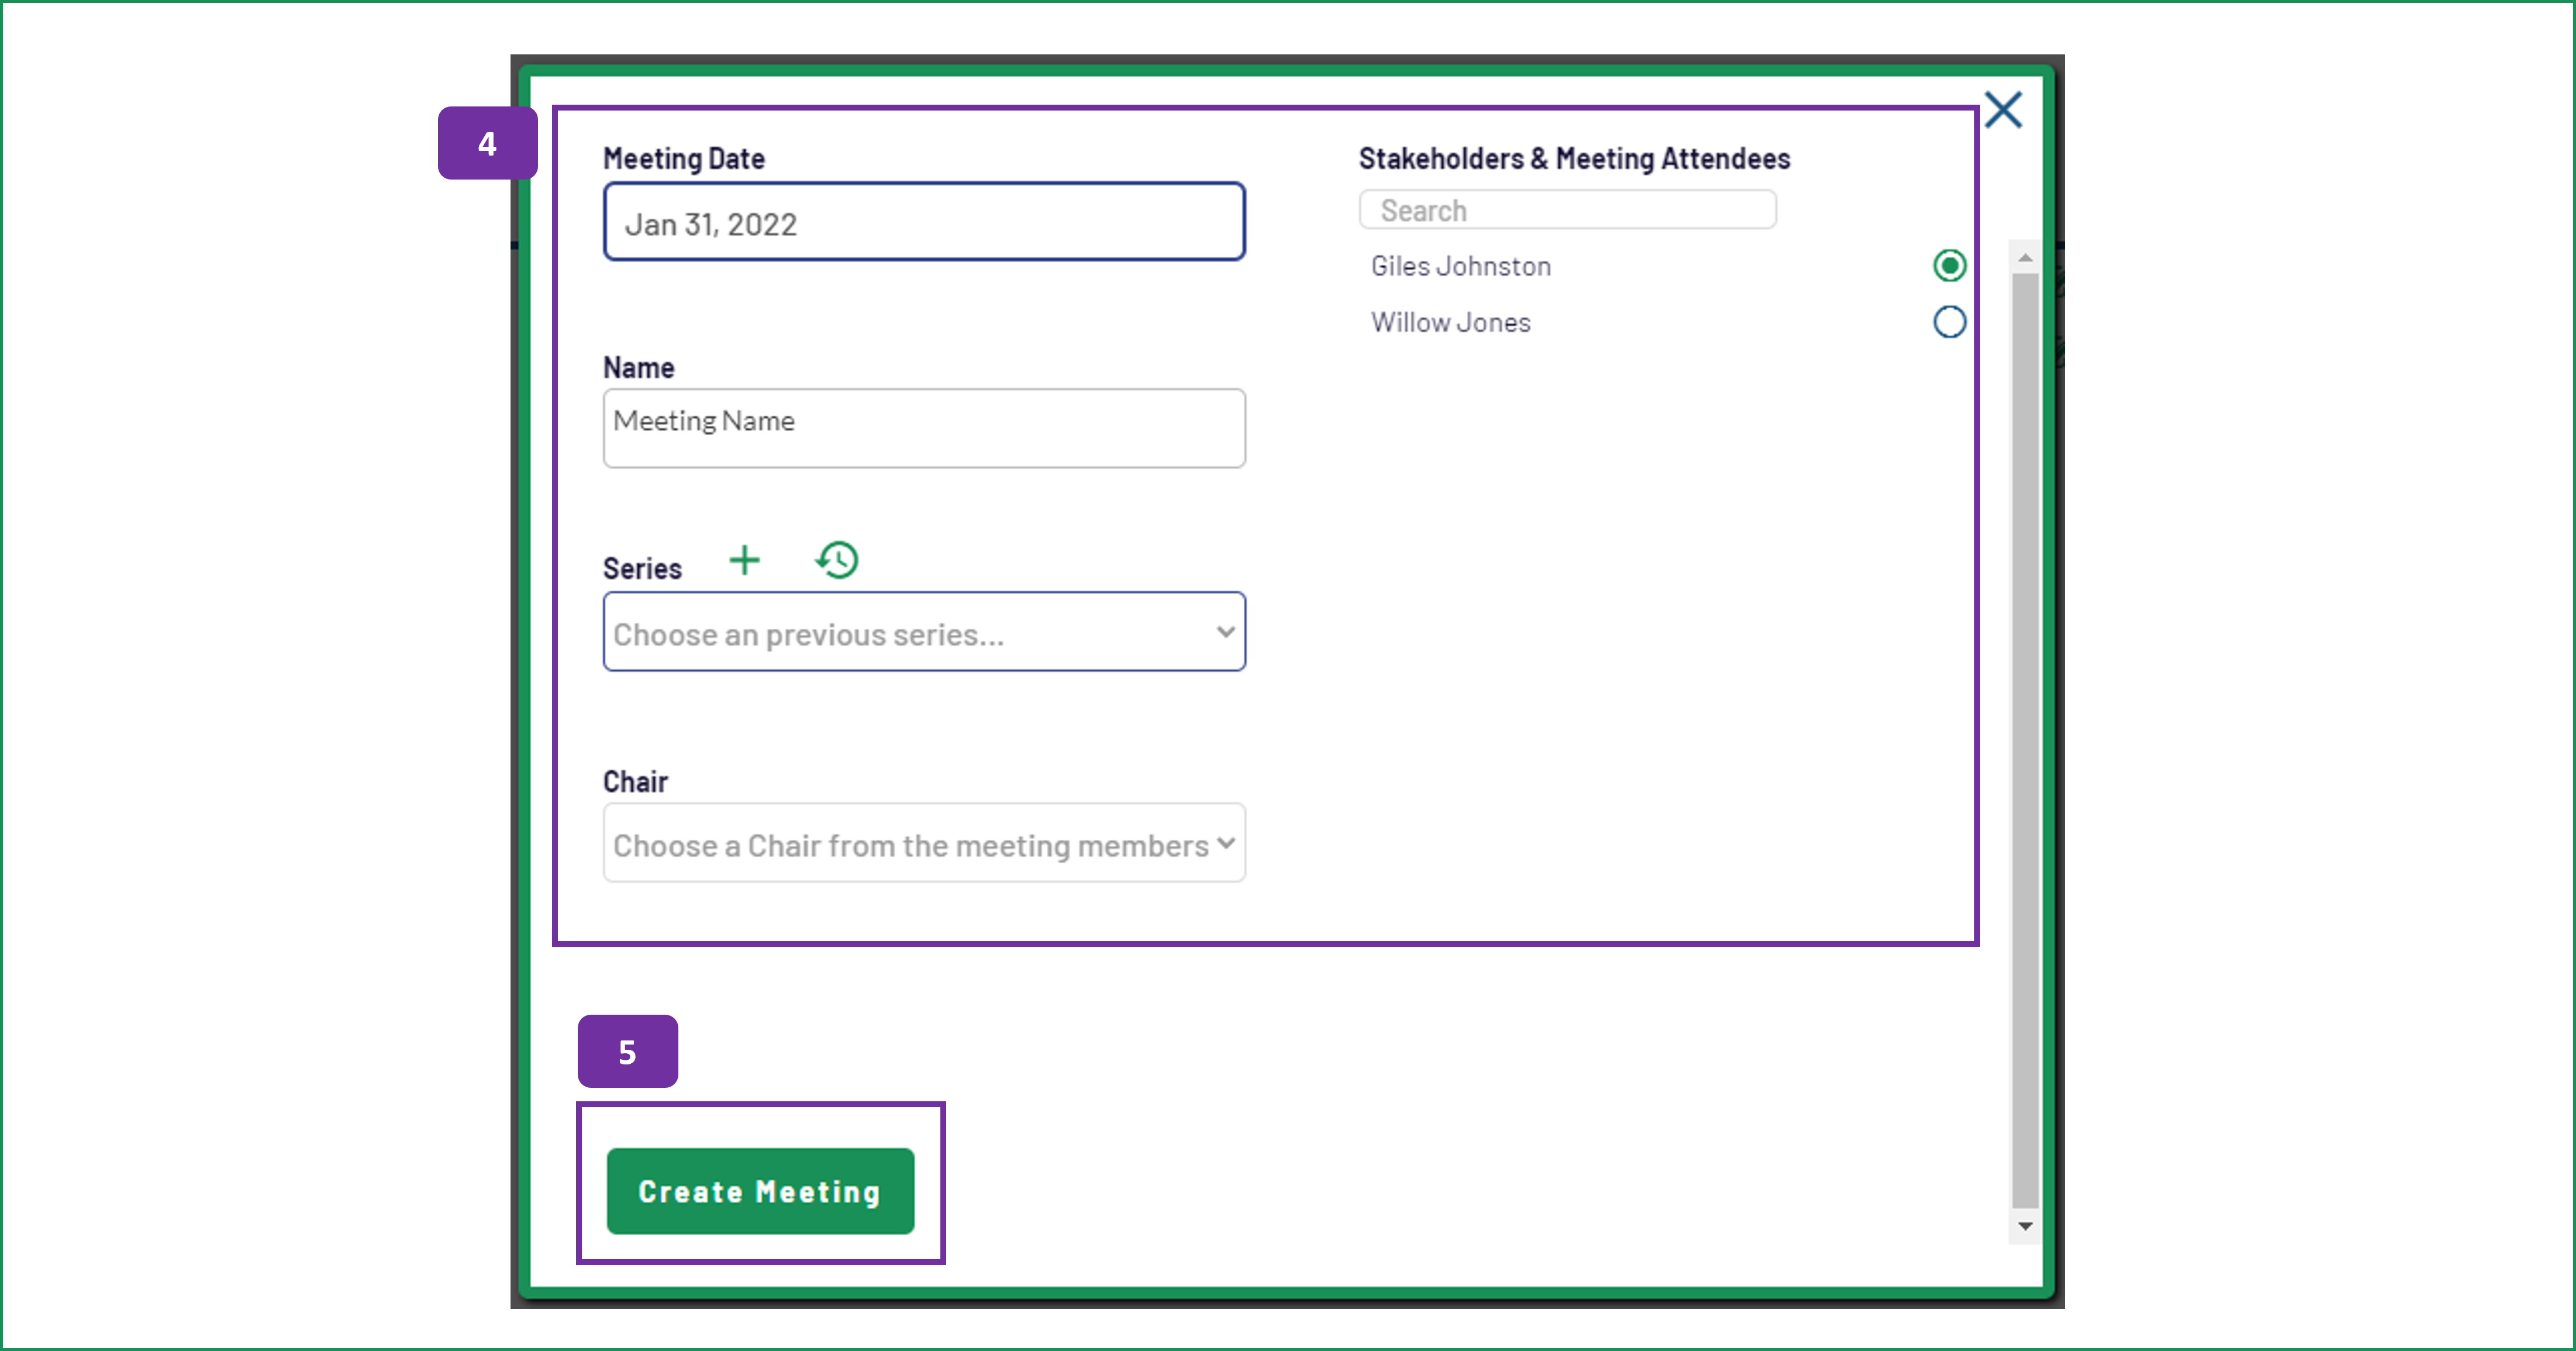
4. To create your meeting you need to set up the information about the meeting first:
- Meeting Date: Choose the date of the meeting from the pop up menu.
- Name: Provide a name for the meeting, to refer to easily later on.
- Series: Use the + icon to create a new series name, or use the clock icon to choose an existing series. By choosing a series you can link the record / tasks from a series of meetings together. For example, for a weekly production meeting, you would select production meeting for the series. Then when you review the meeting, you can also review all previous production meeting tasks too.
- Stakeholders & Meeting Attendees: Choose the relevant team members from the list available. This will control access to the meeting's records. Meeting members Issue To and Approve By selections (determined from the setup menu) can receive and approve tasks as they are assigned.
- Chair: Select the Chair of the meeting from the drop down option. You will be able to choose a Chair from the selected stakeholders & meeting attendees already selected.
5. Click on the Create Meeting button to create the meeting in the database.
6. The navigation options for the meeting are:
- Arrow icon: Return to the list of meetings.
- Three lines icon: Open up the (standard) agenda tool, see points 11 and 12.
- Clipboard icon: Bring up the notes for this meeting.
- PDF icon: This will allow you to create a PDF print out of the meeting record. Please note that this is only available with a paid subscription.
7. If you have selected a series for your meeting, you can use the following two options:
- Clipboard icon: This will show you just the records for this meeting.
- Clock icon: This will show you all of the records for the meeting series.
8. You can search and sort the records using these options above the meeting records. The selections can be reset by using the green 'reset' icon.
The sort options are:
- Approved: This orders the records so that items that have been approved are at the top of the screen.
- Archived: Shows the archived items first then sorted by due date oldest first, then description alphabetical, then task alphabetical.
- Concern: Sorts the list by the Concern column, in alphabetical order.
- Completed: Changes the list order, so that completed tasks are shown at the top of the screen.
- Due Date: Lists the records in due date order, earliest first.
- Priority: Changes the list order so that the highest priority records are shown first.
- Start Date: Presents the records, sorted by start date, in ascending order.
- Task: This sort displays the records, sorted by the task information, in ascending alphabetical order.
9. To create a new record for the meeting, click on the New Task button. See point 13.
10. The meeting records are shown in this part of the screen. The intention of the meeting record is to capture the concern / decision reached and the associated task.
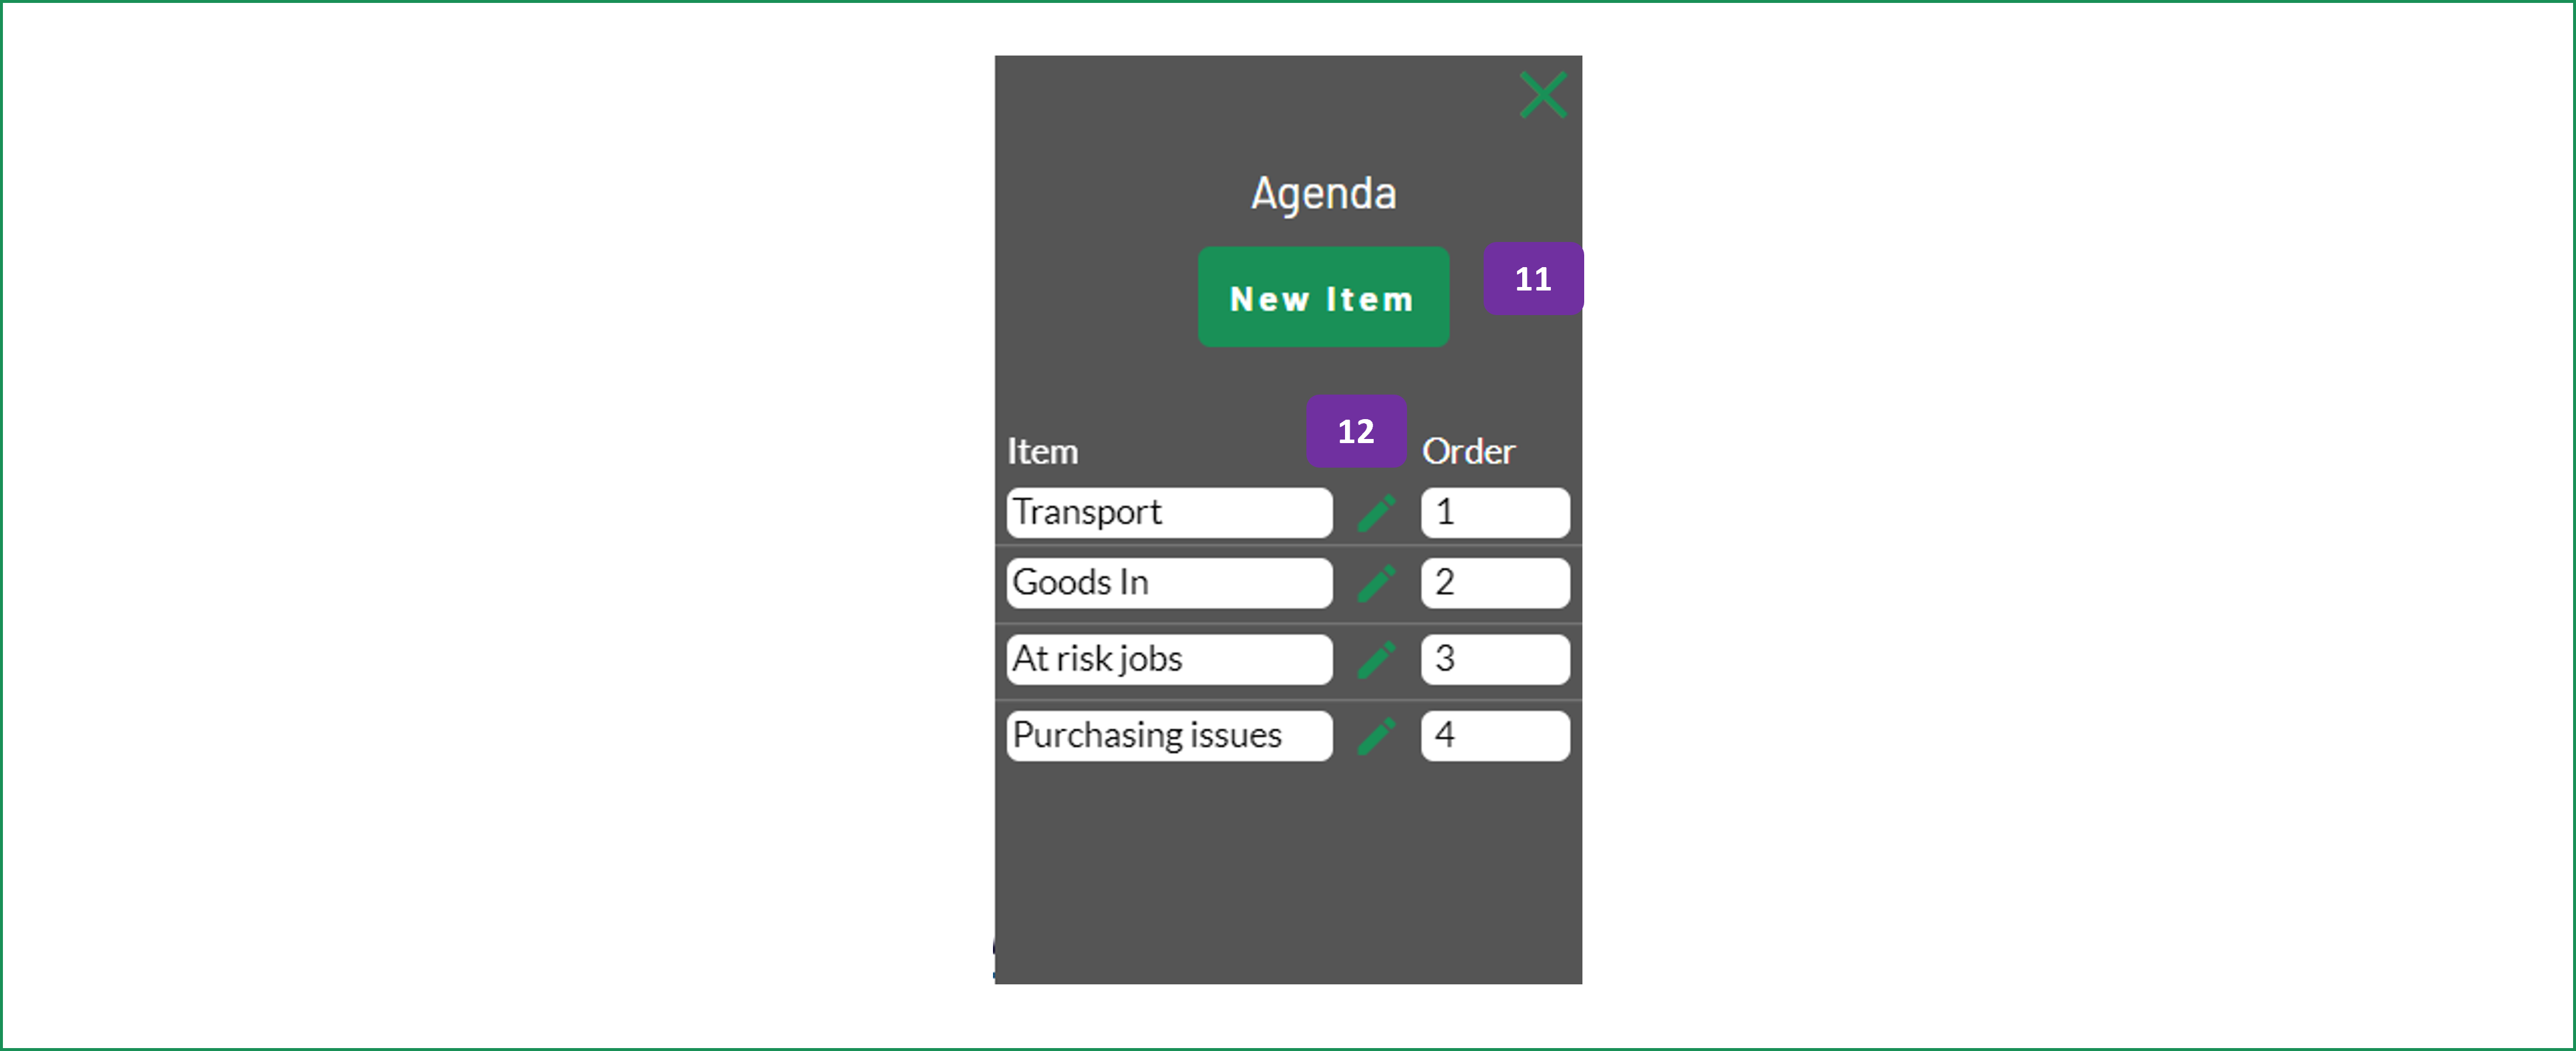
11. To add a new element to the meeting agenda, click on the New Item button. The agenda is attach to the the meetings series. For new meetings with the same series, you can use the same agenda.
Type in the Item's description, then a value for the order sequence. Click on the green disk icon to save the item.
12. To edit an existing item, click on the pencil icon.
To change the sequence of the agenda, change the order values against each item.
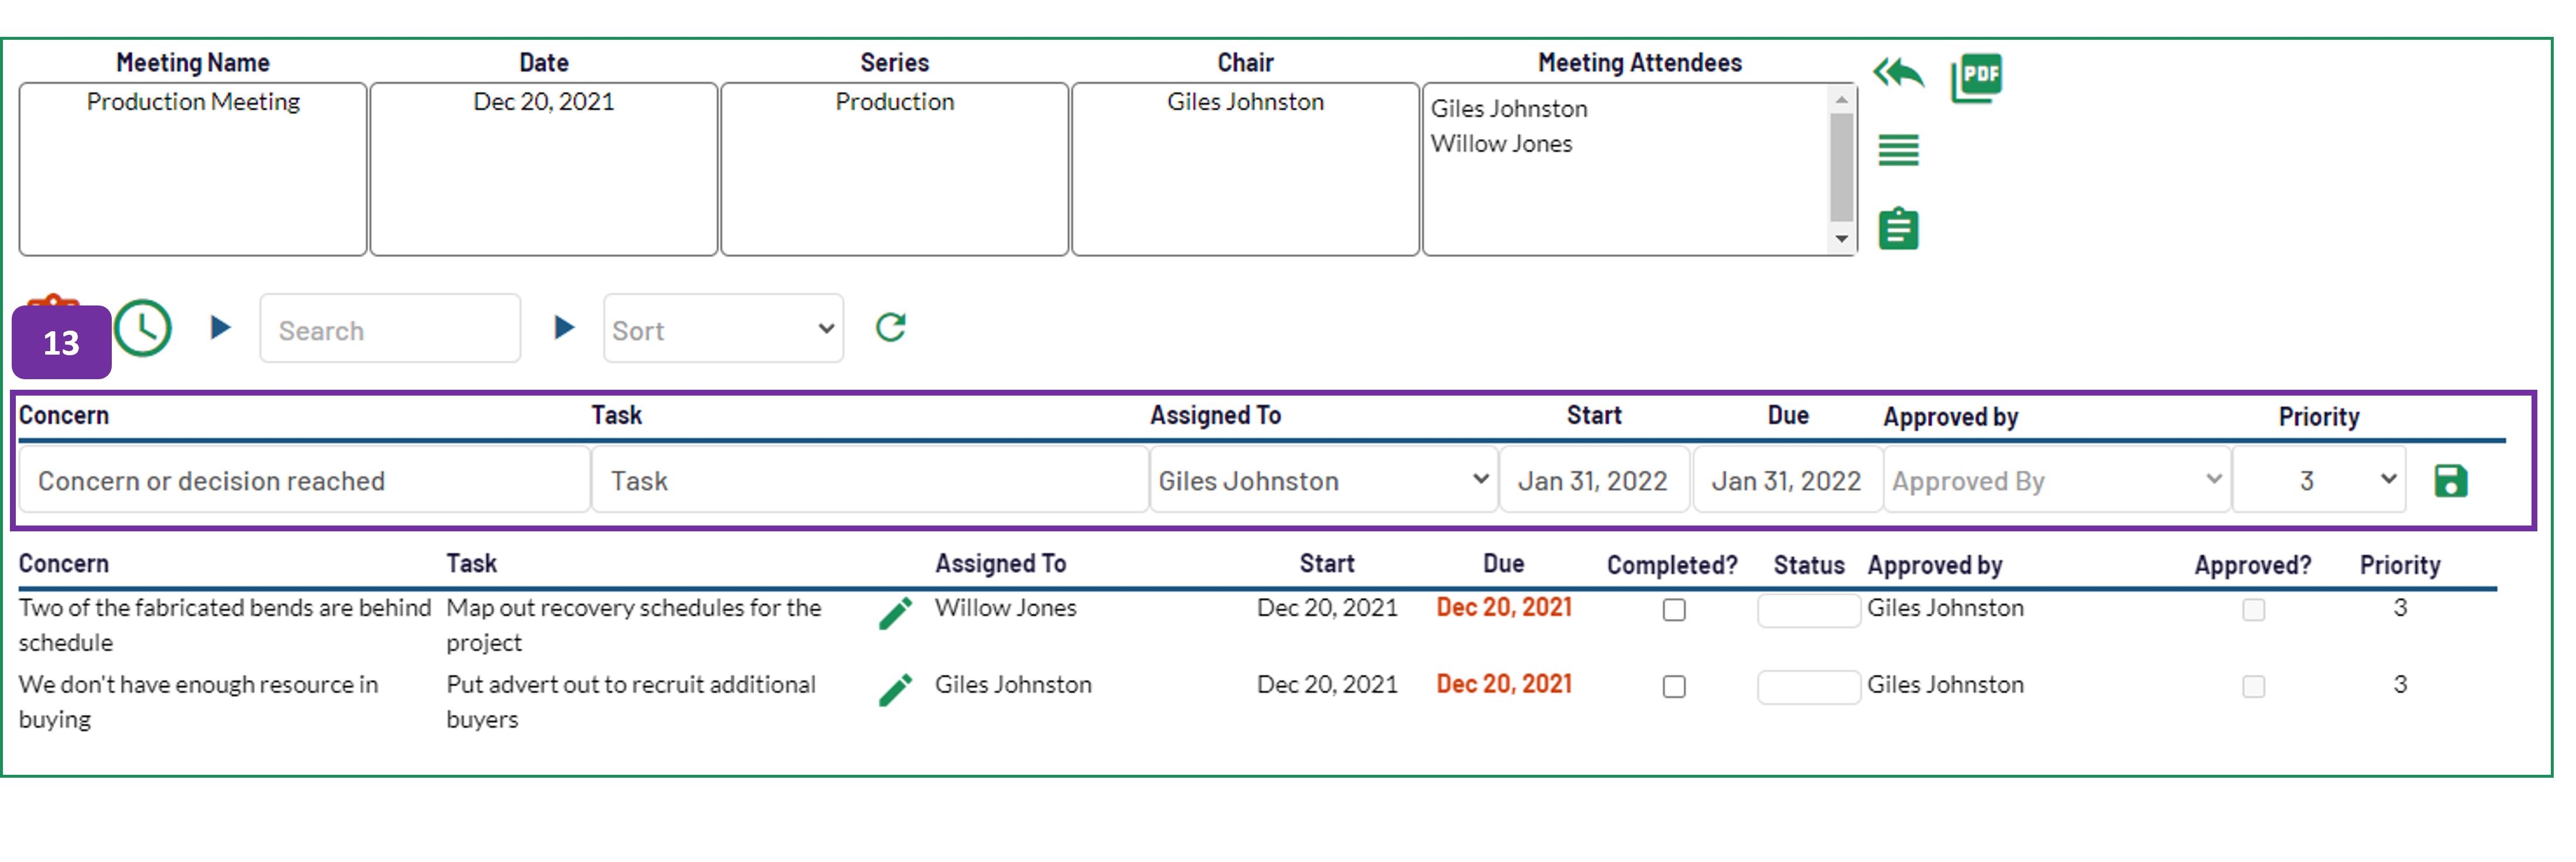
13. To add a new record (New Task), complete the fields as follows:
- Concern: Capture the concern discussed, or a decision reached during the meeting.
- Task: Define the task that needs to be carried out, to address the concern / decision.
- Assigned To: Select the team member that will be responsible for the task. You can assign task to people outside of the attendance of the meeting.
- Start: Choose a start date for the task.
- Due: Choose a completion date for the task.
- Approved by: If you want the task to be approved before it is deemed fully complete, choose the team member from the drop down options.
- Priority: Promote or demote the action, using this option (if required).
When you have entered all of your information, click on the green disk to save the record.
Repeat this process to capture the meeting's discussion and actions.
All of the actions defined will be visible on the corresponding options on the My Tasks screen. Any team member can edit the task from the meeting screen. Only the task creator can edit the task on the My Task screen.


