Audits
Determining the standard of a workplace, or process, and then checking is the essence of good management. Our module allows you to quickly create and carry out audits, as well as generate the follow up actions (which can then be managed via the My Tasks module).
Use this module to track any type of audit findings, results, and actions. This includes management, process, system, regulatory, and supplier.
Once you establish audit standards, you can copy the standards to a new audit and then conduct similar audits on new areas.
For any audit, you can have an unlimited amount of findings. And for any finding, you can have an unlimited amount of tasks. You can review all the tasks for a selected audit or you can review all the tasks for a given finding of the audit.
For every created task, the standard and finding is copied to the task description.
1. To create a new audit, click on the New Audit button.
2. To filter the views for the existing audit records, use the following:
Using the Views dropdown:
- My Audits: This will allow you to see just your audits.
- Direct Staff Audits: This option allows you to see your direct reports, as per the setup configuration.
Using the Sort dropdown will sort the list of audits in the following manner:
- Audit Name: Name of the audit, in alphabetical order.
- Date: Descending, newest first.
- Department: Alphabetical order.
- Organization: Alphabetical order.
- Process: Alphabetical order.
- System: Alphabetical order.
- Type: Alphabetical order.
The Search field can also be used to search through the audit names and the other fields, the results will appear on the screen after the search term has been typed.
The filtered view can be removed by clicking on the green 'reset' icon.
3. The three icons at the end of the audit entry are as follows:
- Briefcase icon: This shows all of the tasks related to an audit, they will be shown above the list of audits.
- Copy icon: This allows you to copy the bulk of the audit, so that you can re-audit and capture new findings. Attached files aren't copied and a prompt will appear before you actually copy the audit. If you are going to use this approach, creating a template and copying from that is a good way to start the audit process.
- Edit icon: This allows you to open up the audit and continue with the editing and recording of finding / creation of tasks. See points 4 to 8 below.
Inside the editing screen of an audit:
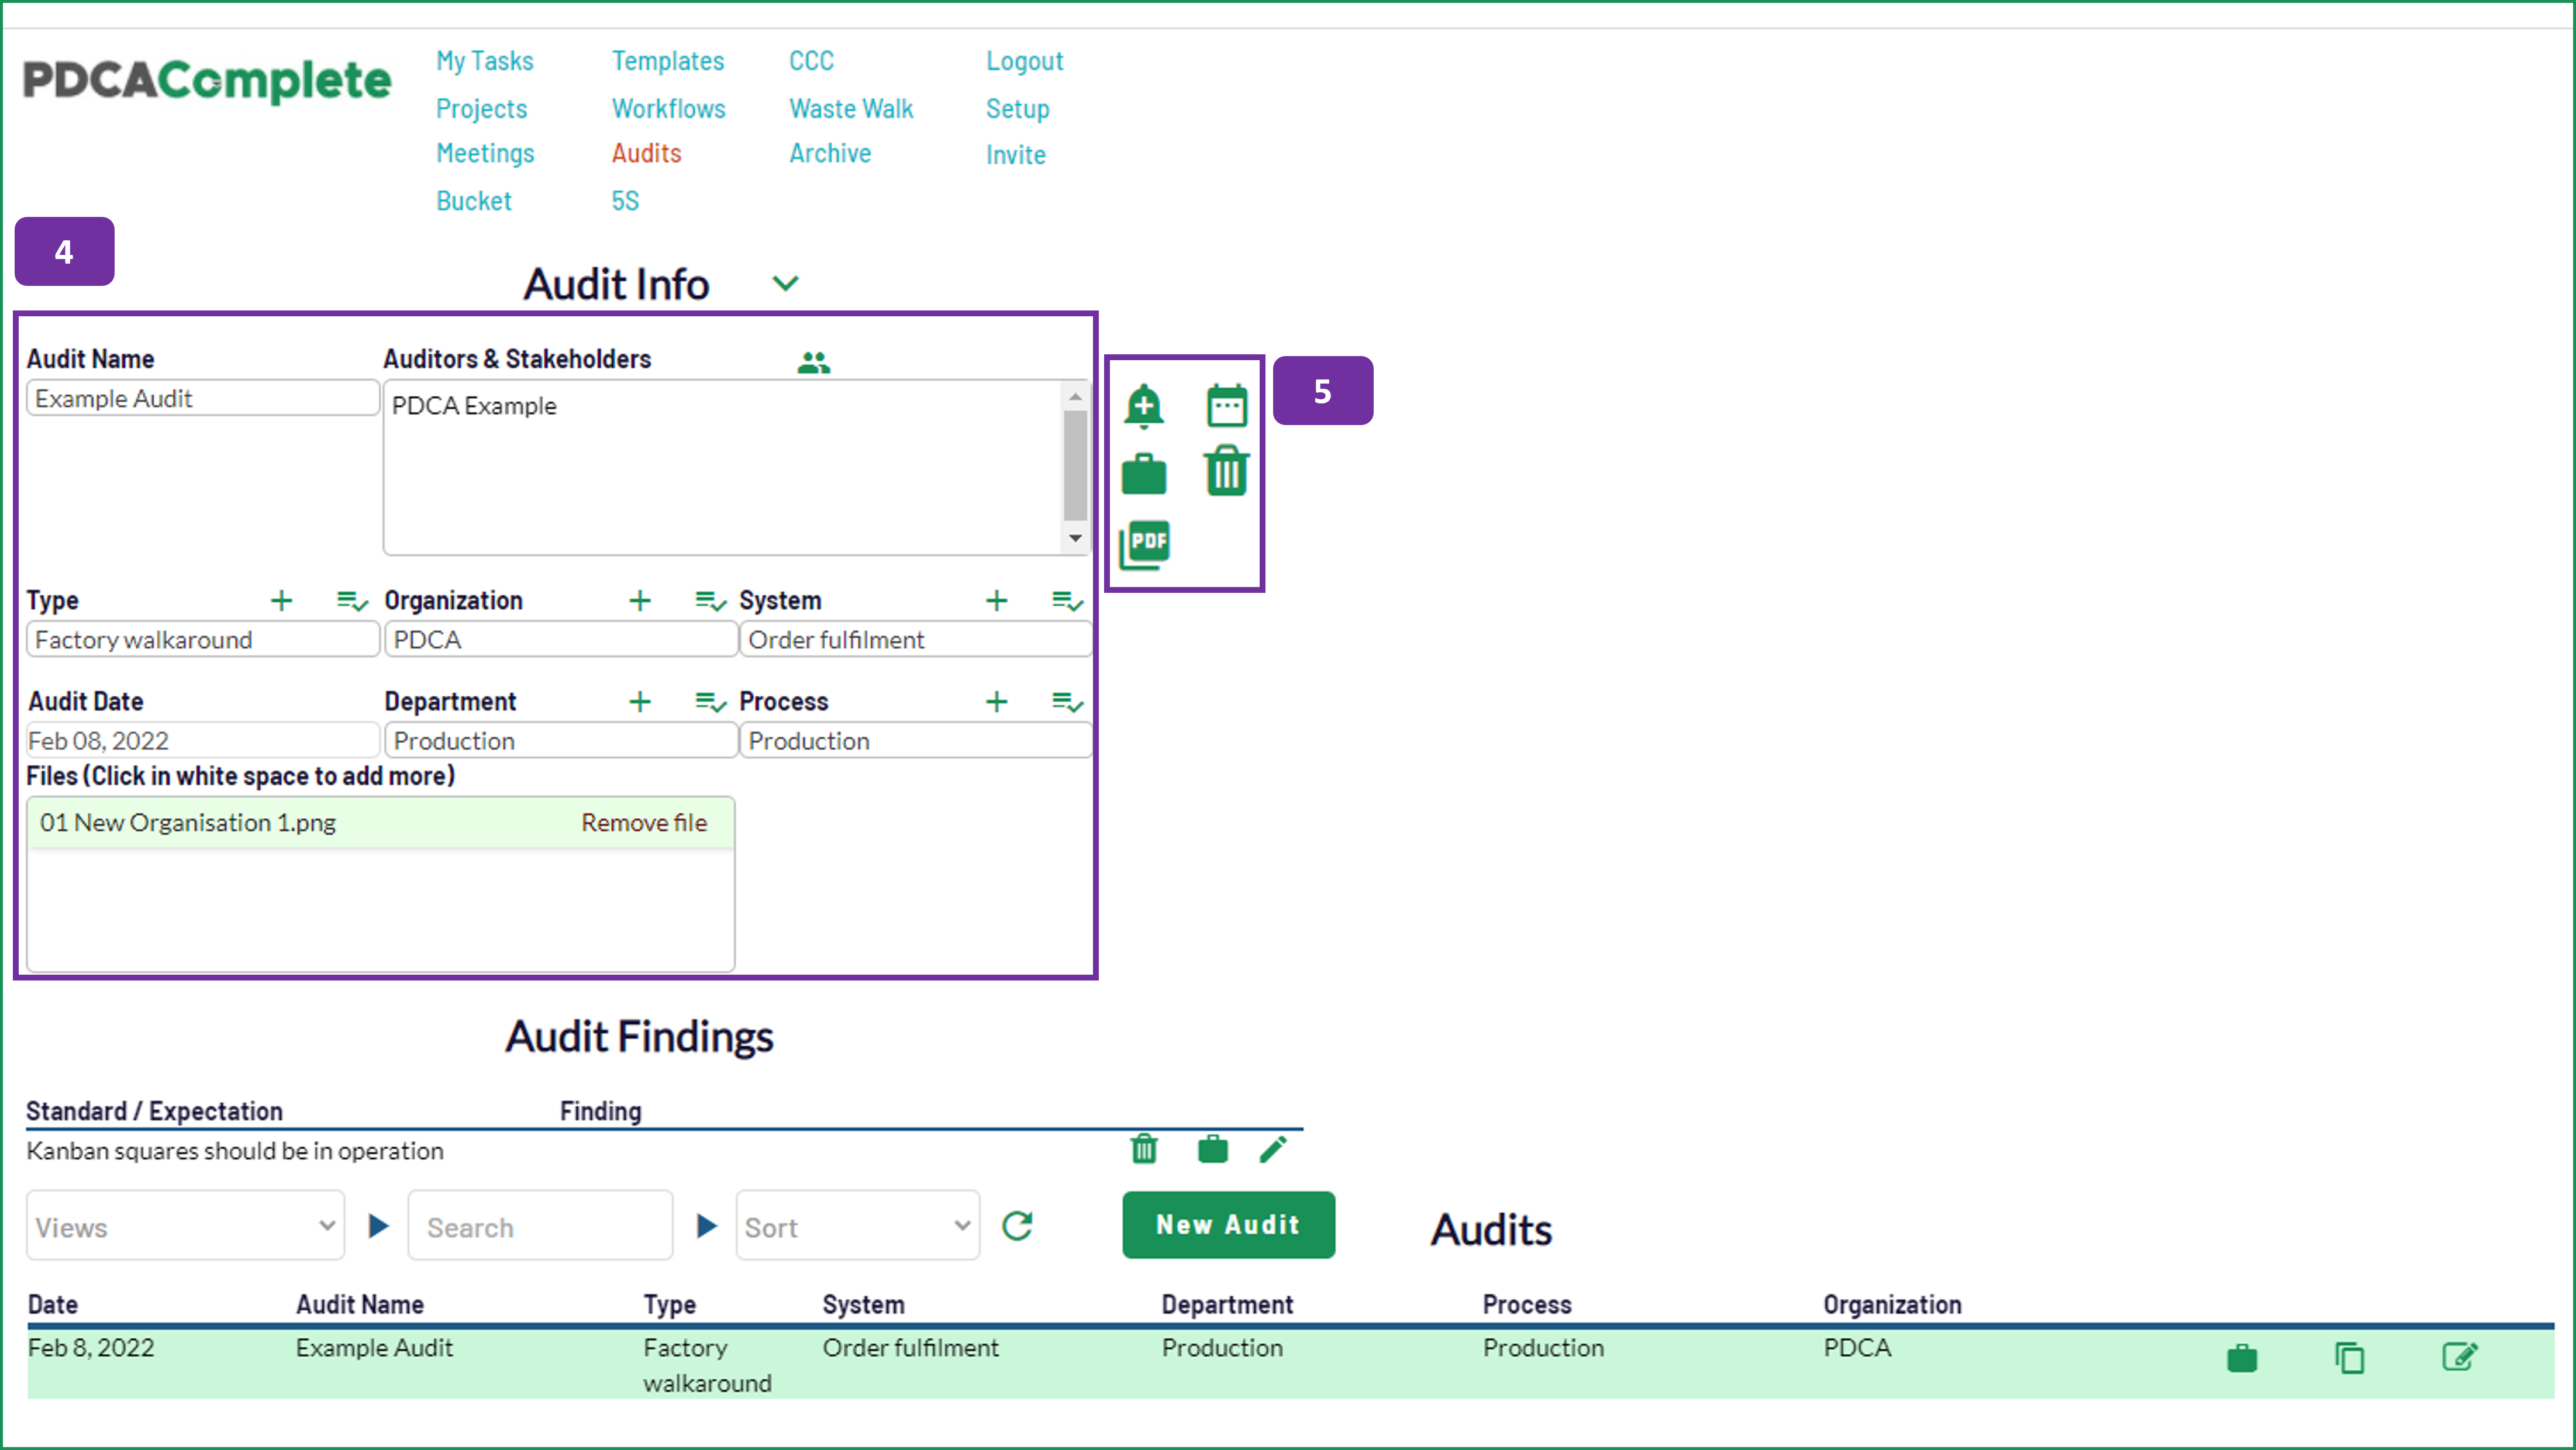
4. This is the header information for the audit. The fields are as follows:
- Audit Name: A relevant name for the audit should be captured here, to help with search results in the future.
- Auditors & Stakeholders: This will help to notify team members as tasks are set later. The stakeholder list can be edited by clicking on the green people icon above the field. You should include the auditors, auditees and anybody responsible for completing the tasks related to the audit.
The following fields all work in a similar manner. The plus icon allows you to add a new record to the drop down. The list with the tick icon allows you to select a previously defined option. So, when you first start you will need to use the plus icon to create your first entry. They can be overtyped if you make a mistake.
- Type: This can be used if you defined alternative types of audit e.g. safety, quality, environmental, IT, HR...
- Organization: This is a great option if you have sister companies or want to carry our supplier audits.
- System: If you have a defined system, capture it here. This could be a formal management system, an IT system, or anything else you can define as a system.
- Department: If the audit is only for a specific part of the business, identify it here.
- Process: Likewise, if you want to distinguish the process being audited record it here.
These fields are not mandatory, but help with reviewing the audits list later on.
The Audit Date can be altered also. Clicking into this field will reveal a popup calendar that you can select the date from.
Files* Insert all associated audit documentation here. Click to select files. Click Remove File to delete the file. Consider adding findings, standards, evidence of issues and evidence of fixes.
5. The options to the right of the audit header information are as follows:
- Bell icon: This is used to add a new finding to the audit, see points 6 and 7 below.
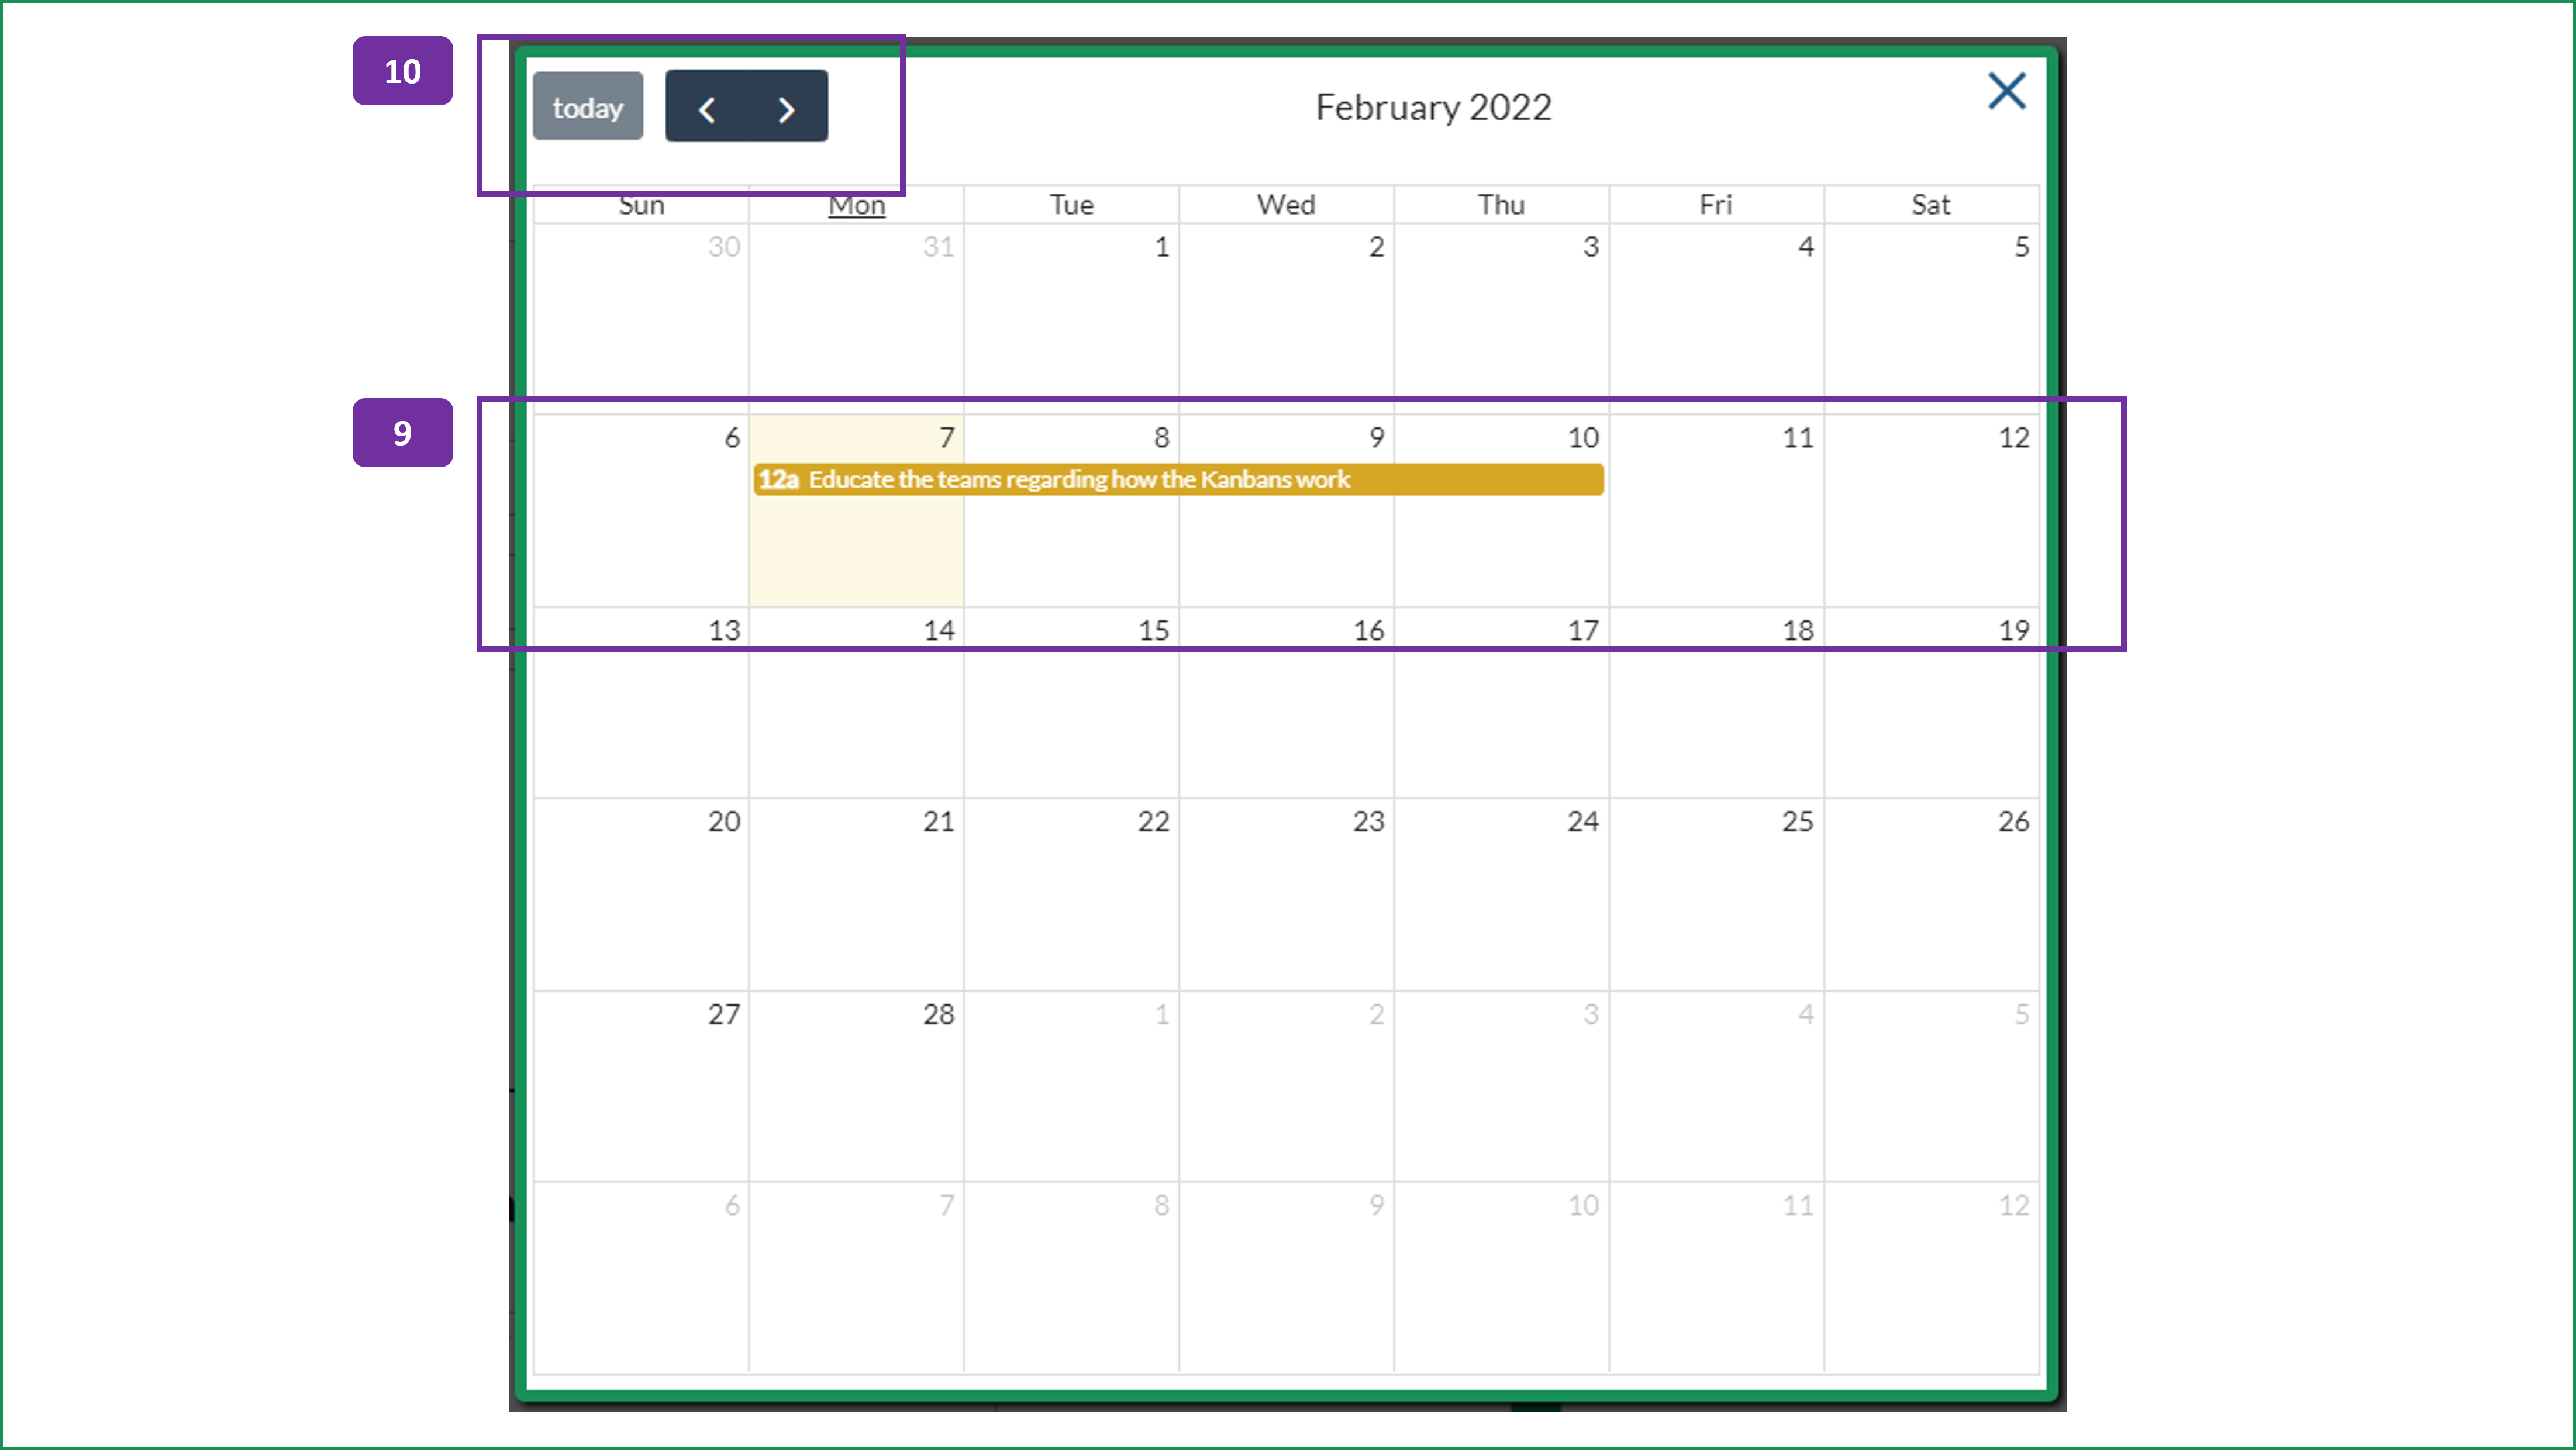
- Calendar icon: Clicking this icon shows you the tasks related to the audit, in calendar form.
- Briefcase icon: All the tasks associated with the audit will appear on the screen, below the findings, when you click on this icon.
- PDF icon: This will allow you to create a PDF print out of the audit. Please note that this is only available with a paid subscription.
- Trashcan icon: You can use this button to delete the audit, only when there are no findings. It will not be visible if there are findings.
6. When you add a new finding, this window pops up. The only mandatory field is the Standard / Expectation. All other fields can be captured later. This is useful if you want to prepare the audit questions and then carry out the actual audit later on, or if you want to create an audit template (see point 3 above).
When you edit the finding, you can add the Finding detail, change the finding's Date and the Auditor. The auditor will come from the list of the Audit Stakeholders.
Files* Insert all associated Finding's documentation here. Click to select files. Click Remove File to delete the file. Consider adding findings, standards, evidence of issues and evidence of fixes.
7. Next to the findings information are three icons:
- Disk: This saves the updates you have made to the finding.
- Add: If you want to add a (corrective) task to the find, click this icon. See point 8 below.
- Briefcase: Click this icon reveals all the tasks associated with only this finding.
8. When the New Task form appears, enter the following data:
- Task: Capture the task details here.
- Assigned to: Select which team member you want to assign the task to.
- Approved by: If you want the task to be approved by an additional team member, select them using this field.
- Start and Due: Choose the relevant dates from this task using the pop up calendars that are associated with these fields.
The task description captures the Standard and Finding. You can edit this and other task properties by clicking the pencil icon. Any member of the stakeholders can edit the tasks on the Audit page. Only the issuer can edit the task in the My Task page.
When you have written your entry, click on the green disk icon at the far right hand side.


